Transactions
The Transactions menu is used to record sales, manage transaction status, print bills/invoices, and export transaction data to Excel. In this module, the main workflow is: create transaction → select customer → add products → set payment → save → print/view invoice.
1. Menu Structure in the Transactions Module
In the sidebar, the Transactions module generally has the following sub-menus:
-
Transactions
To create and process sales transactions until completion. -
Return Transactions
To process return transactions (refund/return) according to store policy. -
Delivery Orders
For transactions that require delivery and recording of shipping information.
2. Transaction List
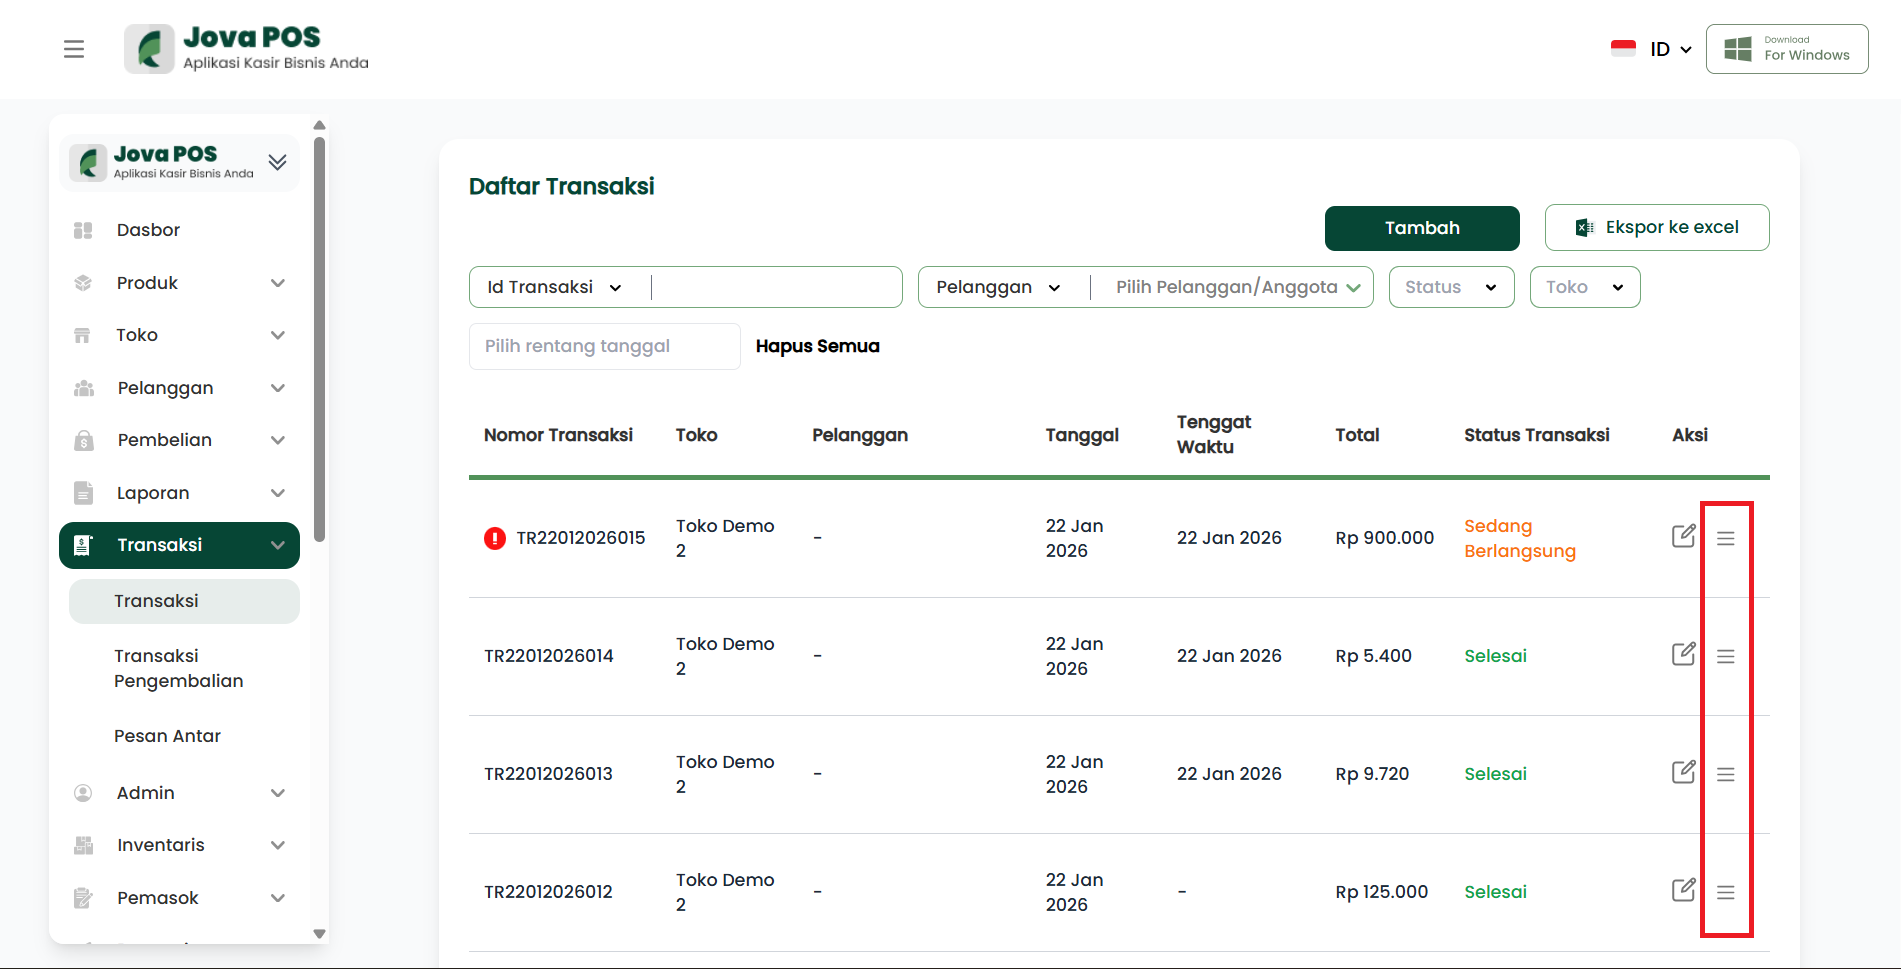
The Transaction List page displays all transactions that have been created, complete with search, filter, and quick action features.
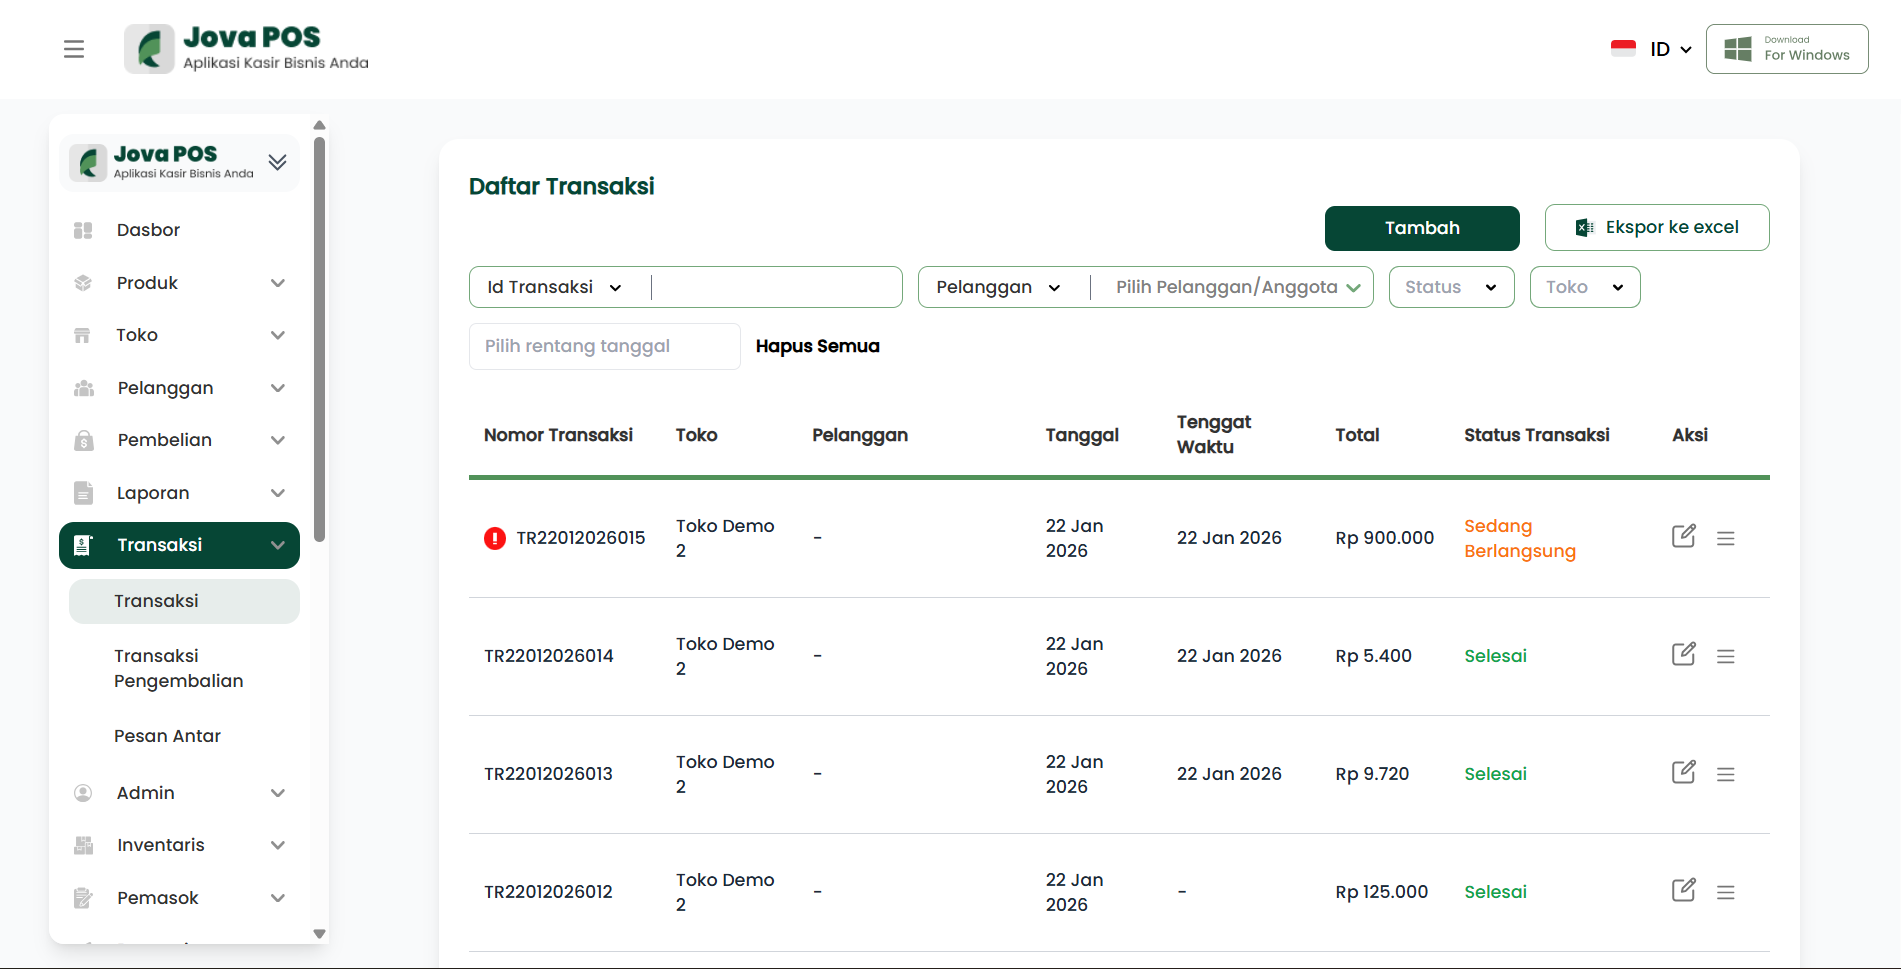
2.1 Main Components of the Transaction List
-
"Add" button (top right)
To create a new transaction.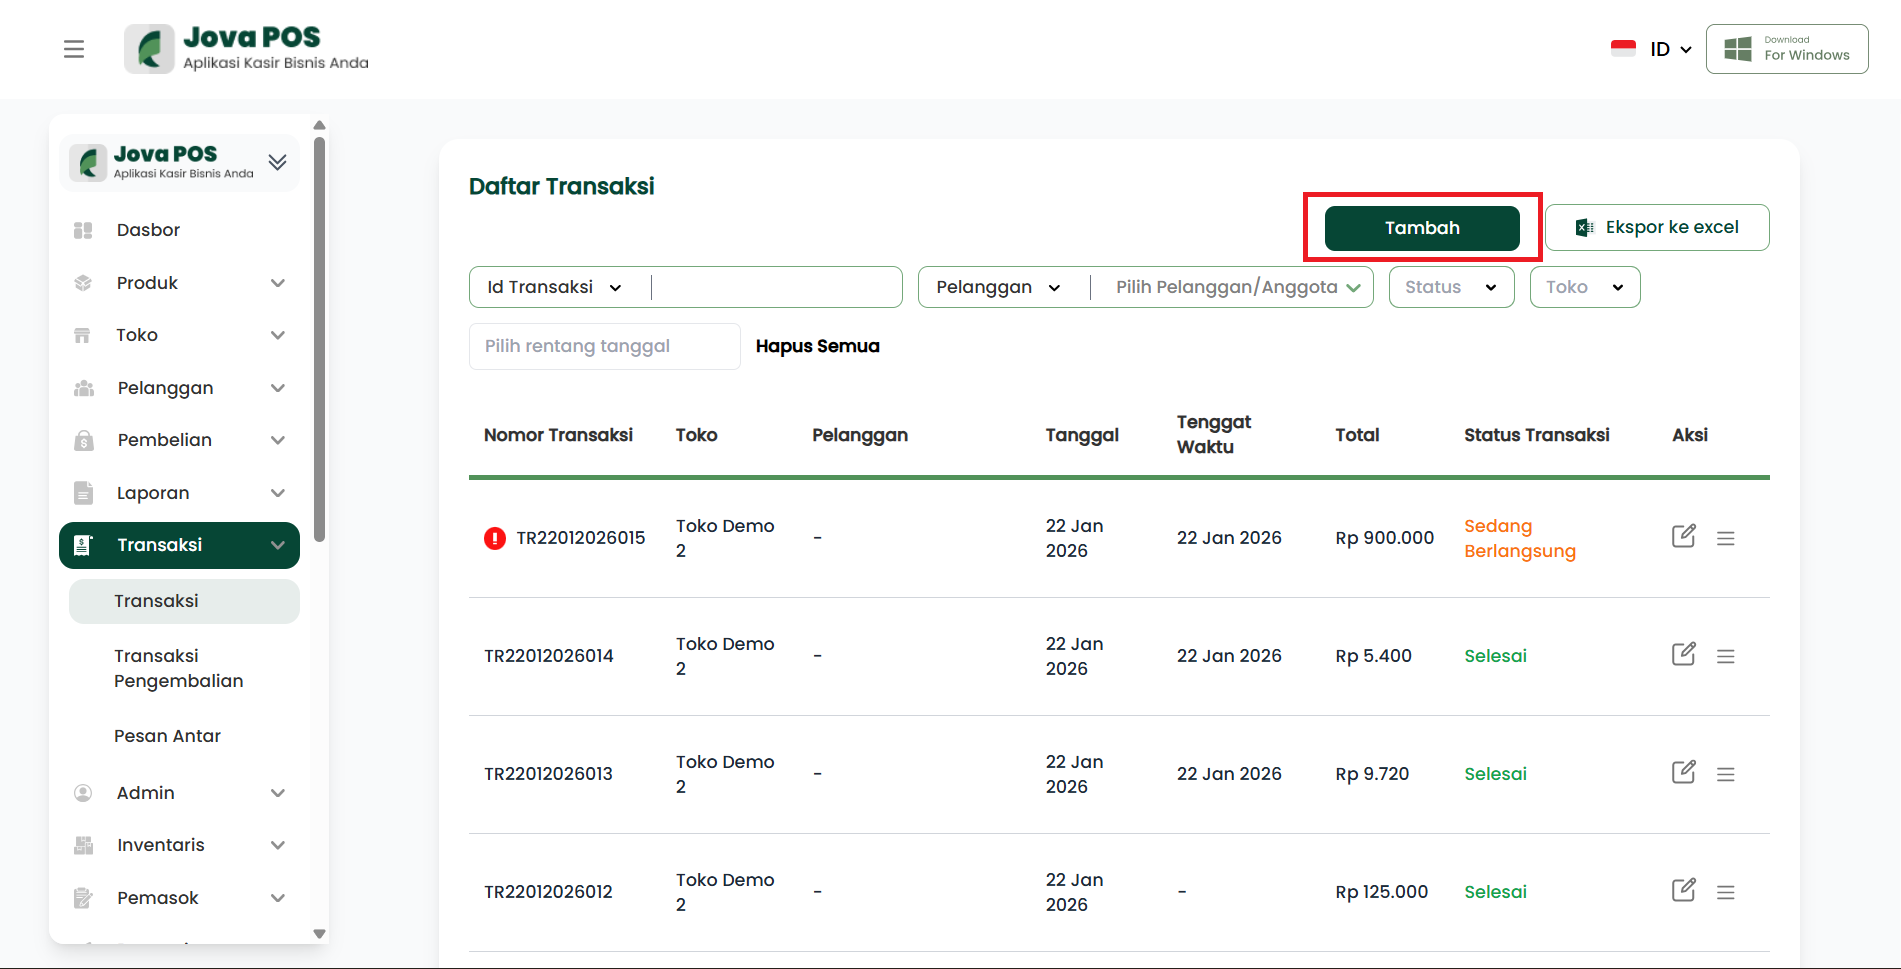
-
"Export to excel" button
To download transaction data (usually following the currently active filters).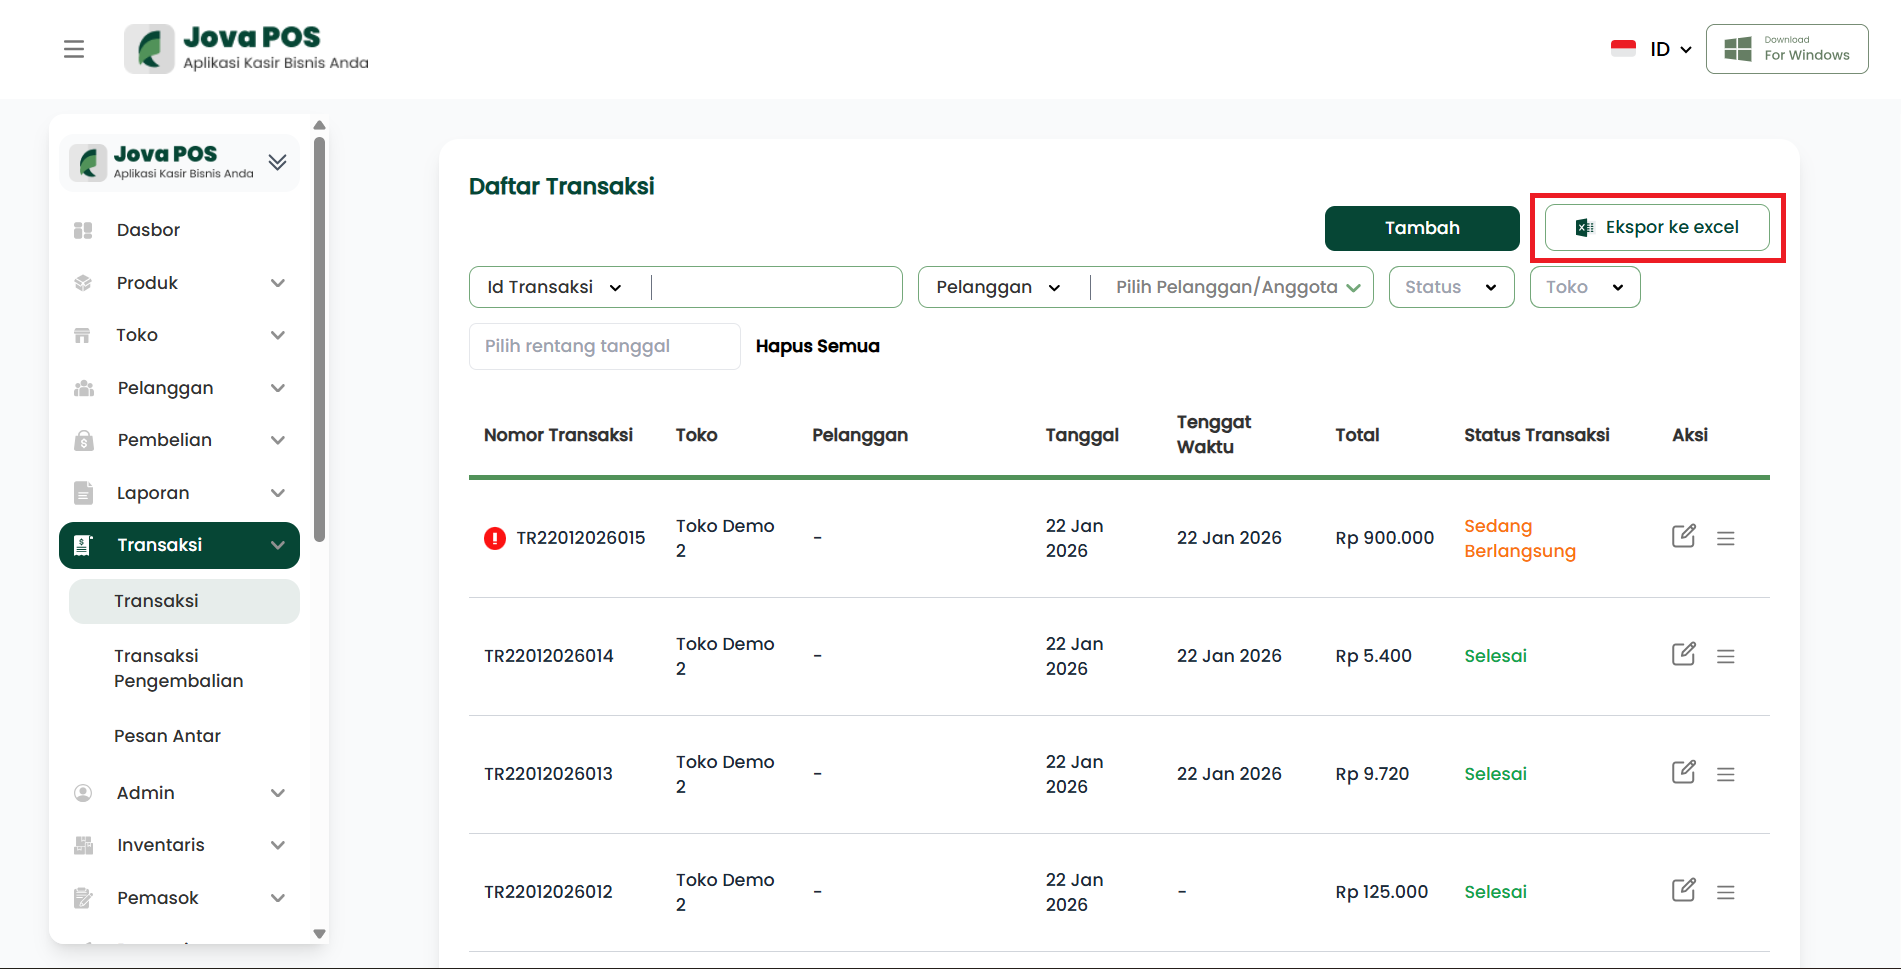
-
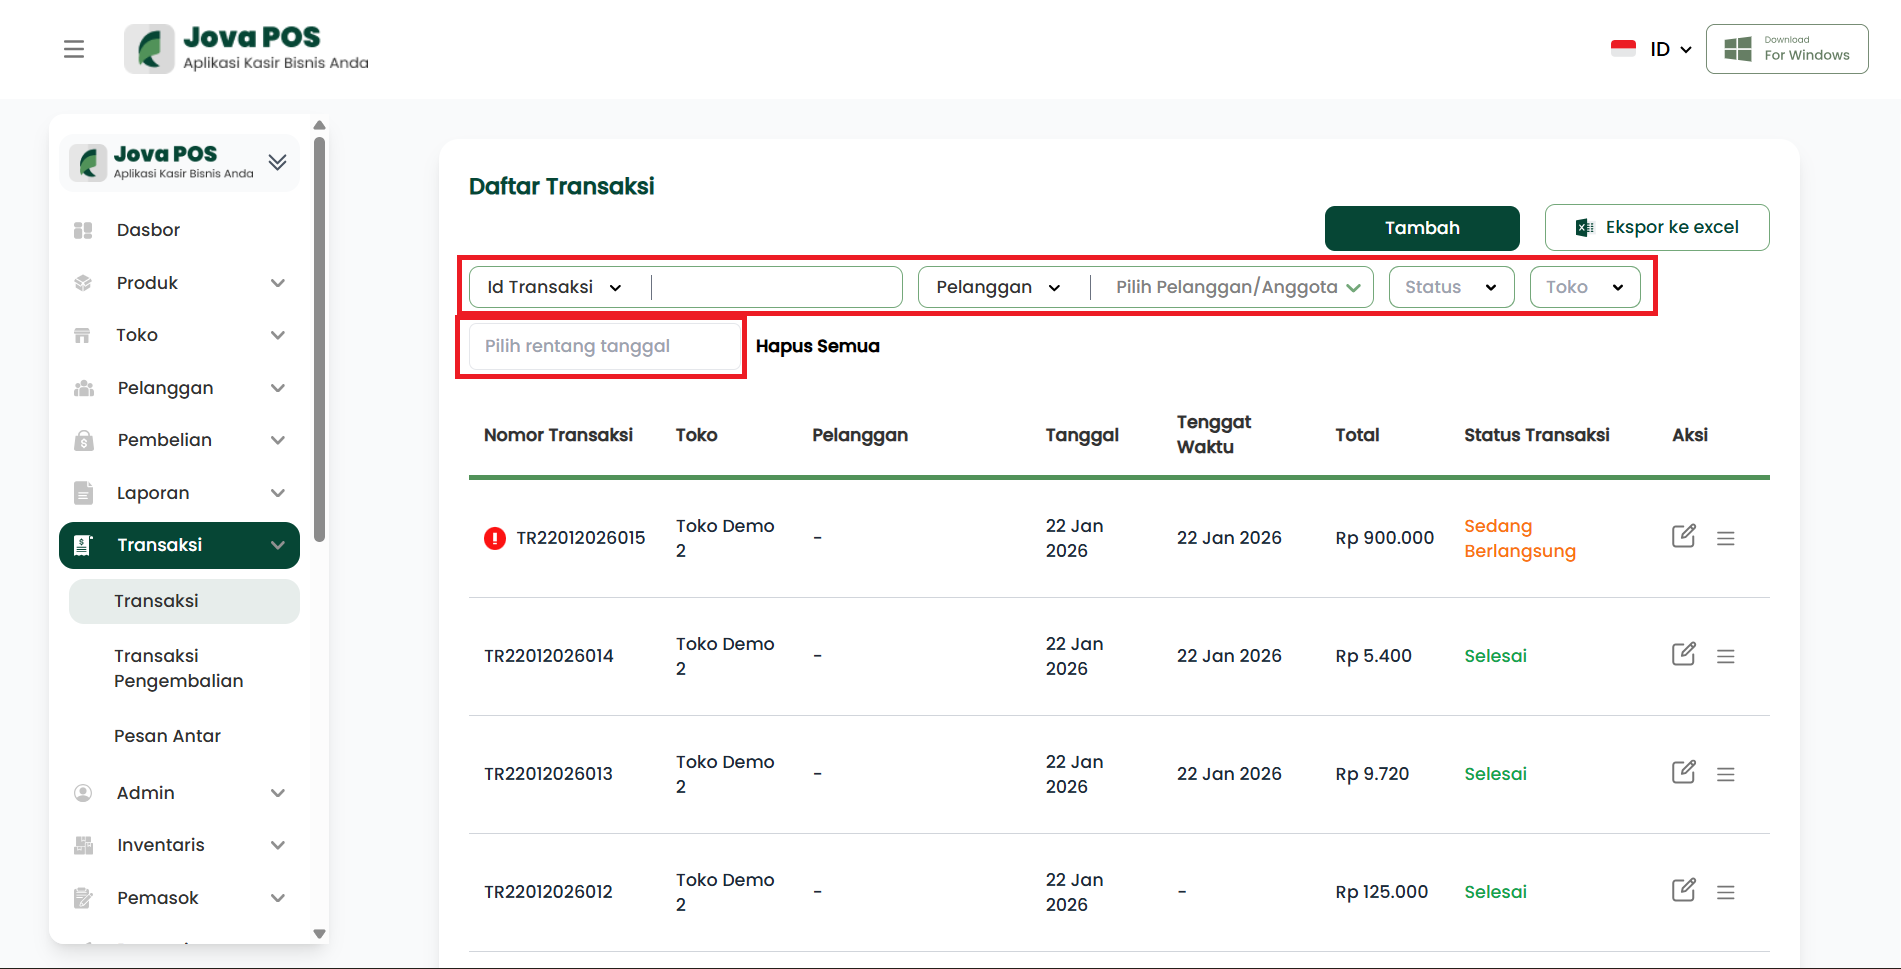
Filter & Search
Generally available filter combinations include:- Filter by Transaction ID
- Customer/Member filter
- Status filter
- Store filter
- Date range (select transaction date range)
-
Clear All
Clears all filters to return to the initial list view.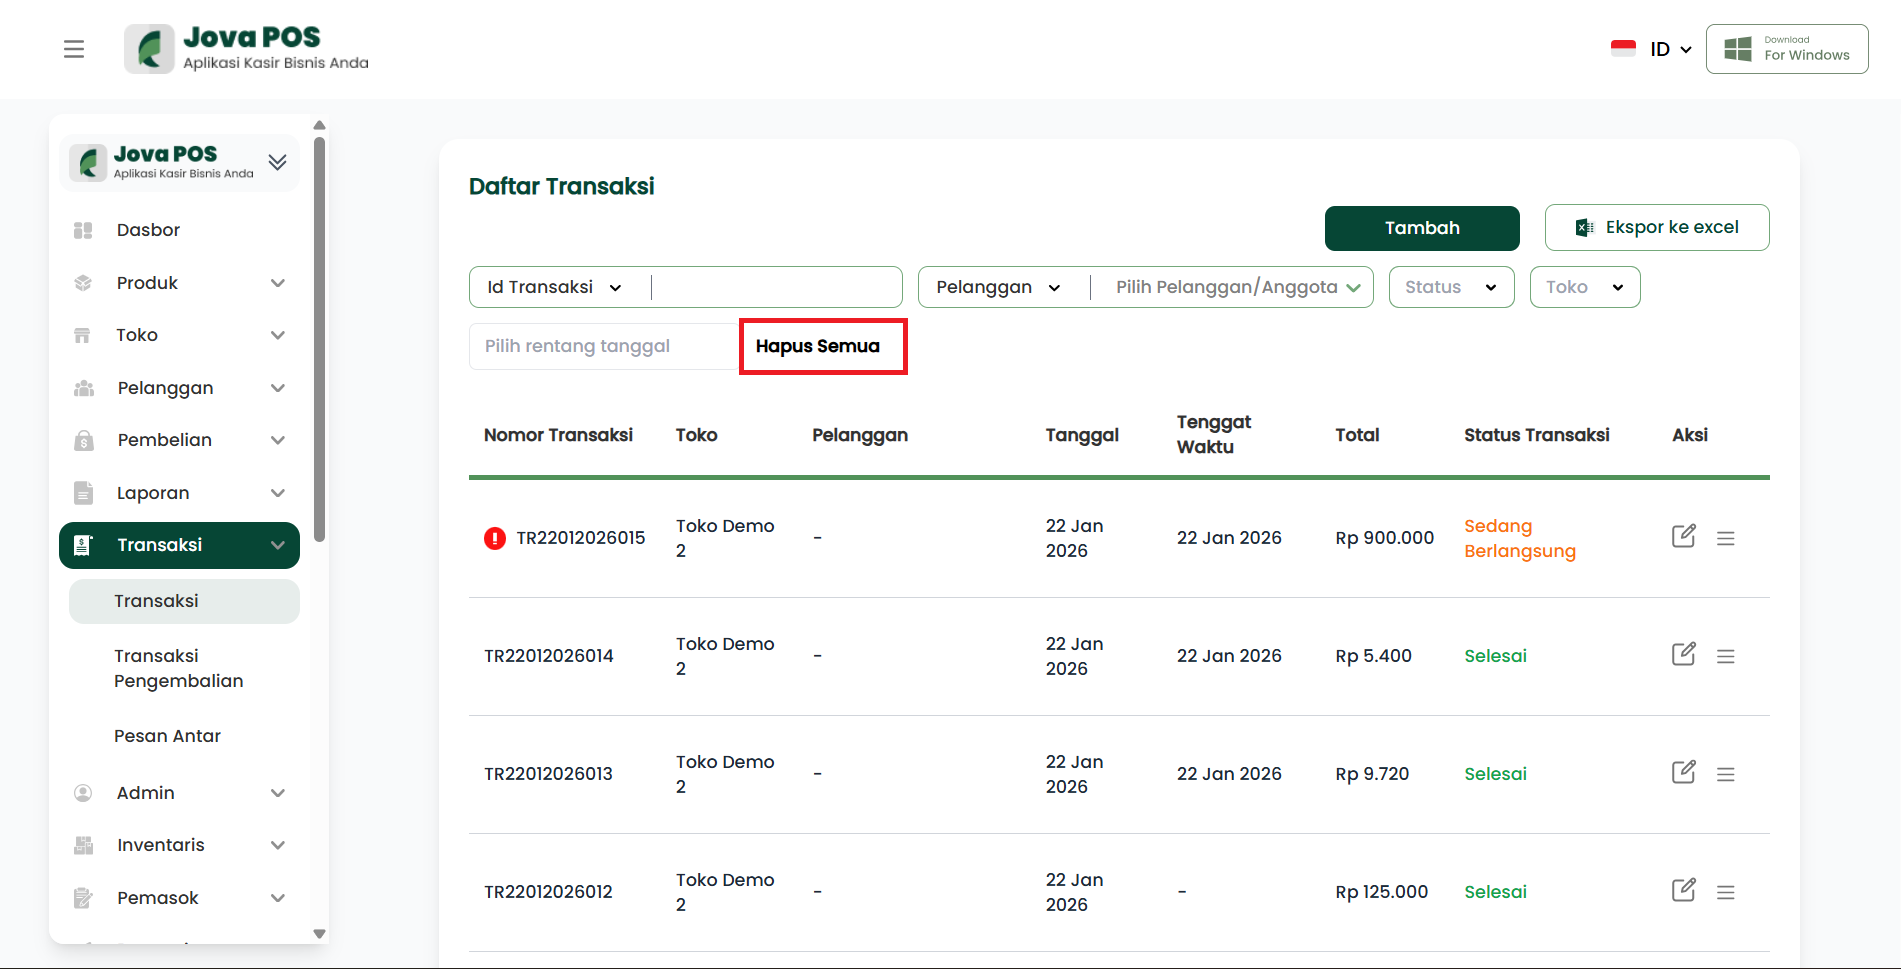
-
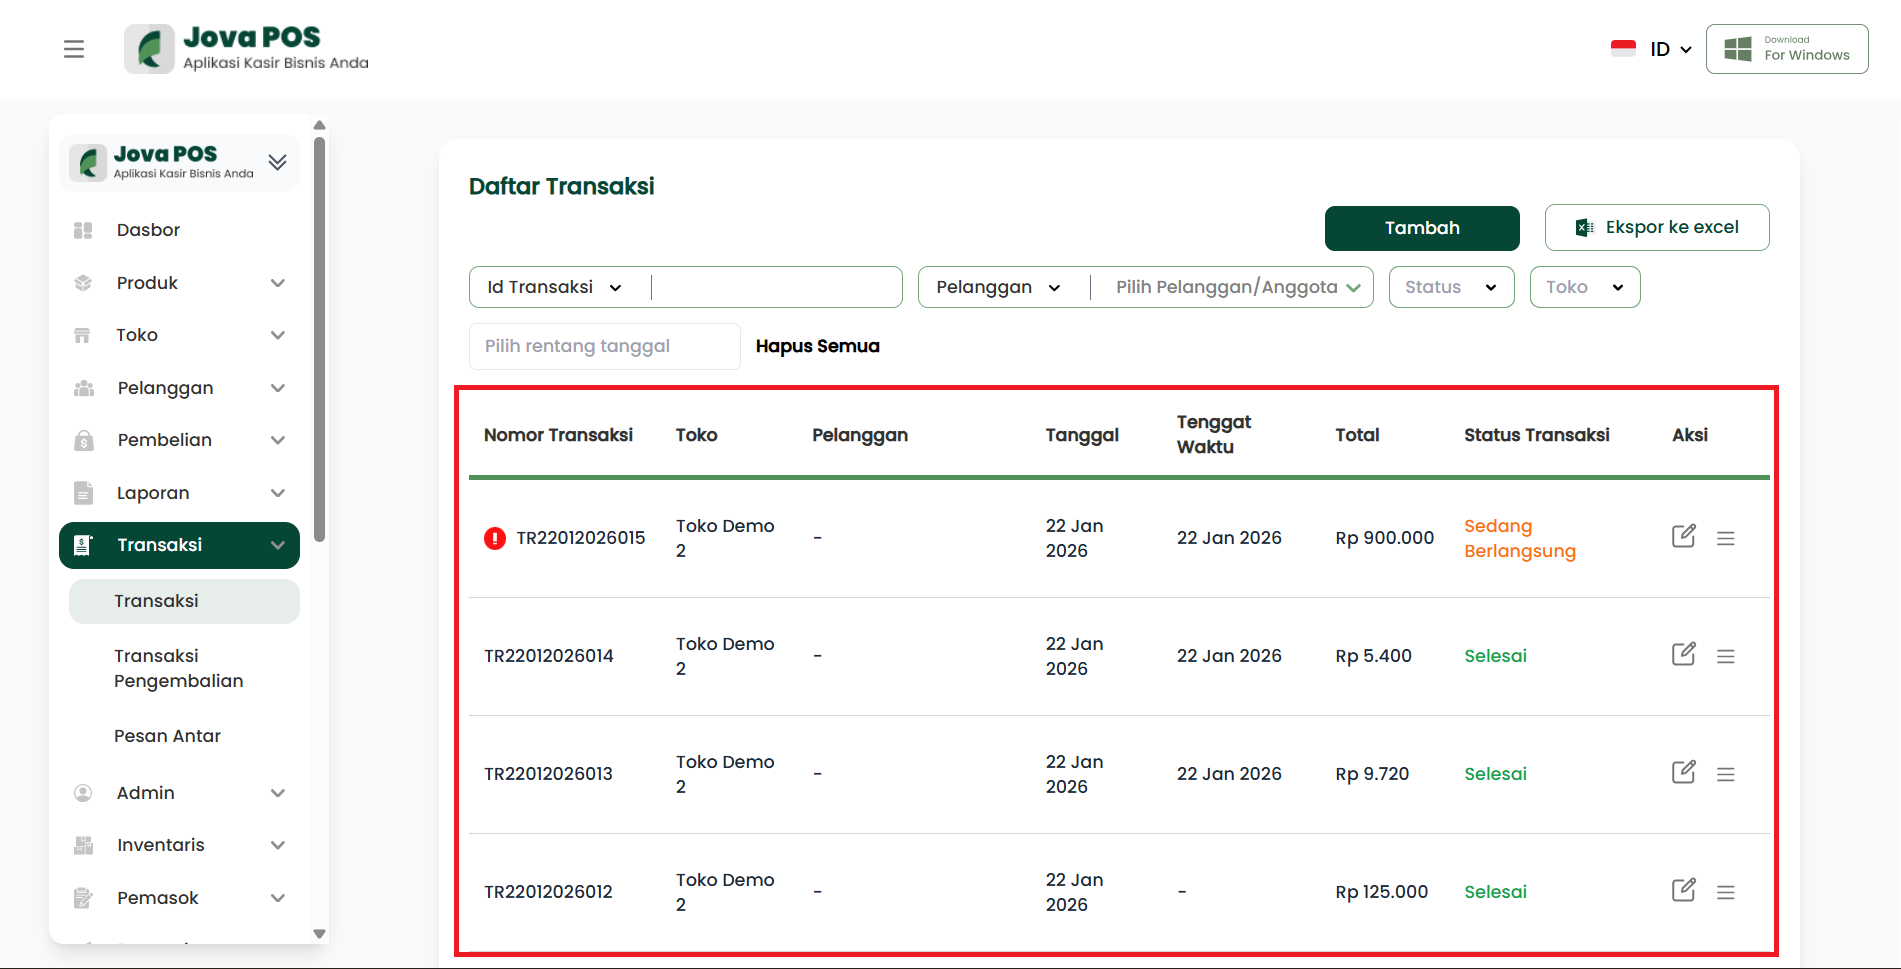
Transaction Data Table
Columns displayed (as shown in screenshots):- Transaction Number
- Store
- Customer
- Date
- Due Date
- Total
- Transaction Status (e.g.: Ongoing, Completed, Returned)
- Action (edit/detail icon, and other action menus)
2.2 How to Search Transaction Data (Optional)
- Open Transactions → Transactions.
- Set the required filters (e.g. Status = Completed).
- Use Date range if you want to narrow the period.
- Click Clear All if you want to restart filters from scratch.
3. Steps to Add a Transaction Until Completion
Step 1 — Go to the Transactions Menu
- In the sidebar, click Transactions.
- Click the Transactions sub-menu (not Return Transactions).
Step 2 — Click the "Add" Button
- On the Transaction List page, click the Add button (top right).
Result: the system opens a new transaction form page.
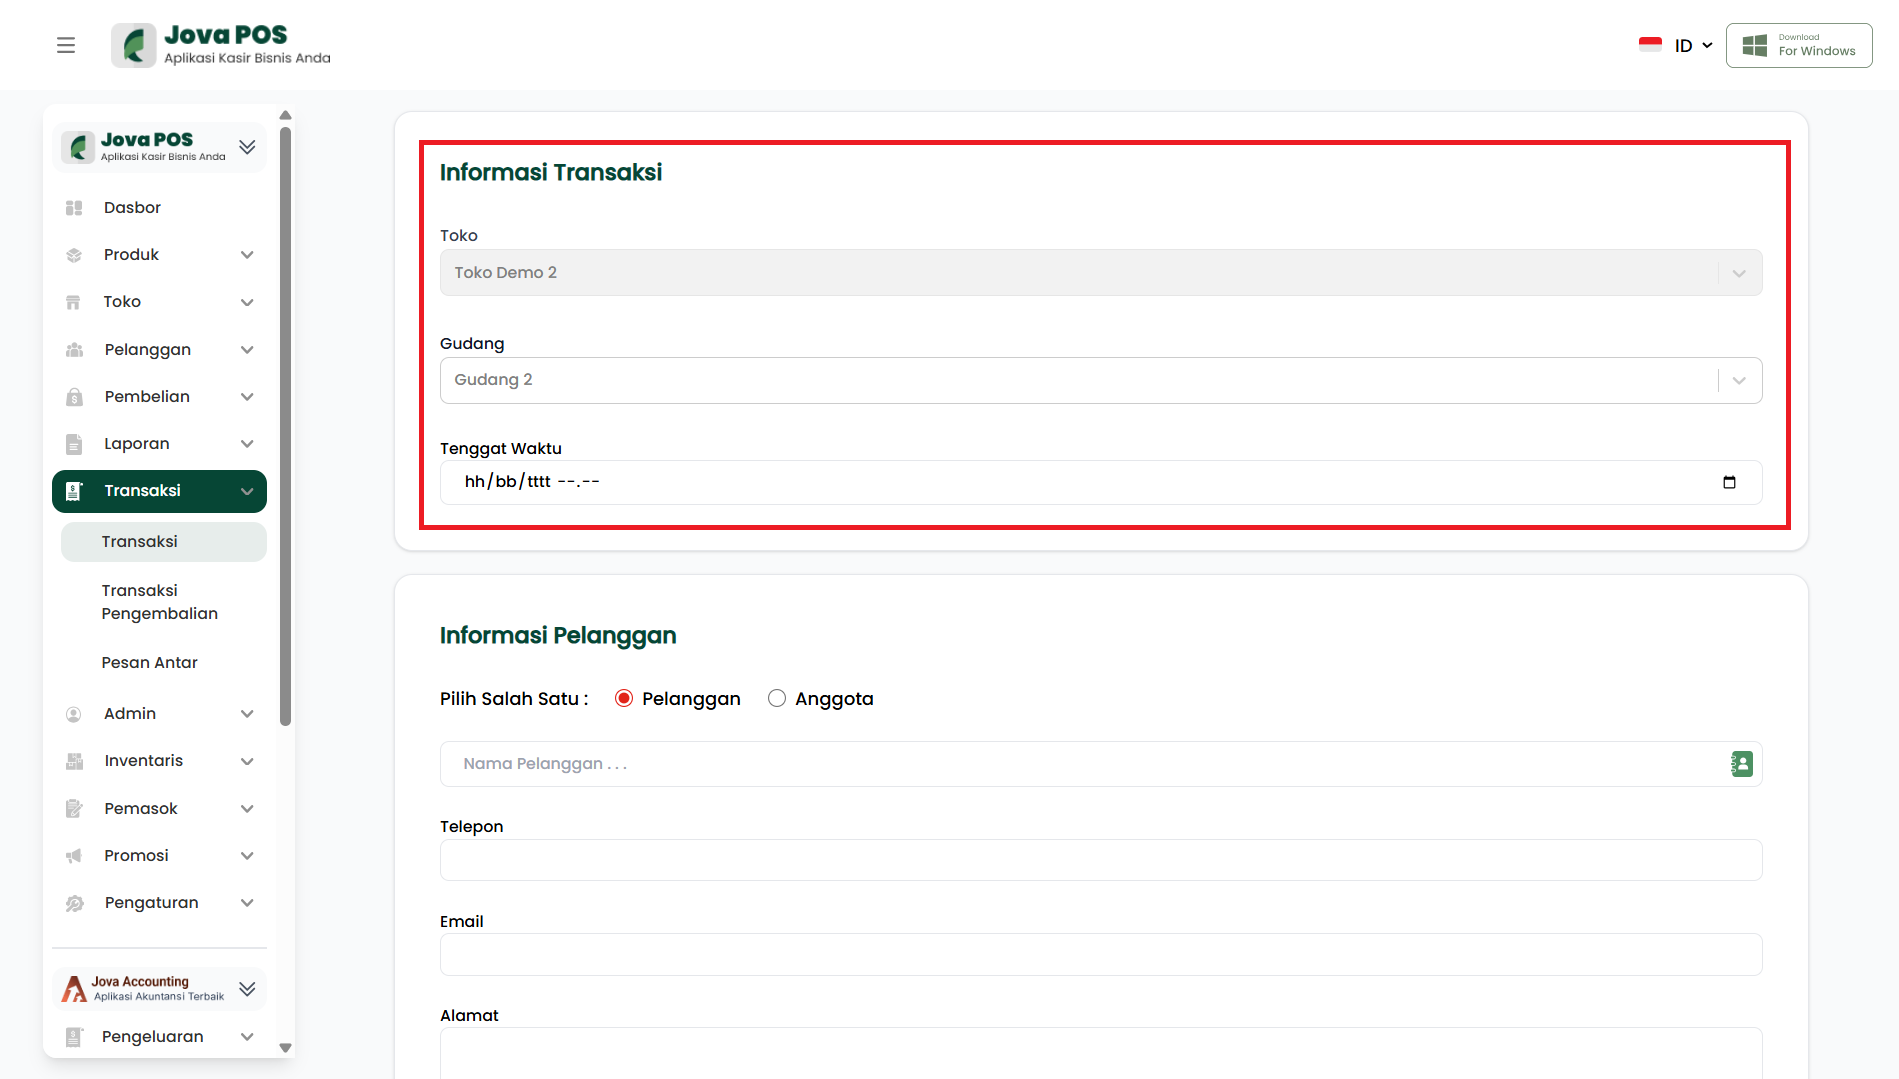
Step 3 — Fill in "Transaction Information"
In the Transaction Information section, fill in the core transaction data.
-
Store
- Select the store/branch where the transaction takes place (example: Cabang Bengkong).
- Make sure to select the correct store as it will affect transaction recording.
-
Warehouse (if available in your form)
- Select the warehouse used as the source of product stock.
- If your system uses stock, the warehouse selection determines stock reduction.
-
Due Date
- Fill in the due date and time (deadline) if the transaction has a time limit (e.g., for orders/bookings).
- Click the calendar icon to select the date and time.
In some views (other screenshots), information may include Employee and Status Information. Generally, these appear after the transaction is created/re-accessed.
Step 4 — Fill in "Customer Information"
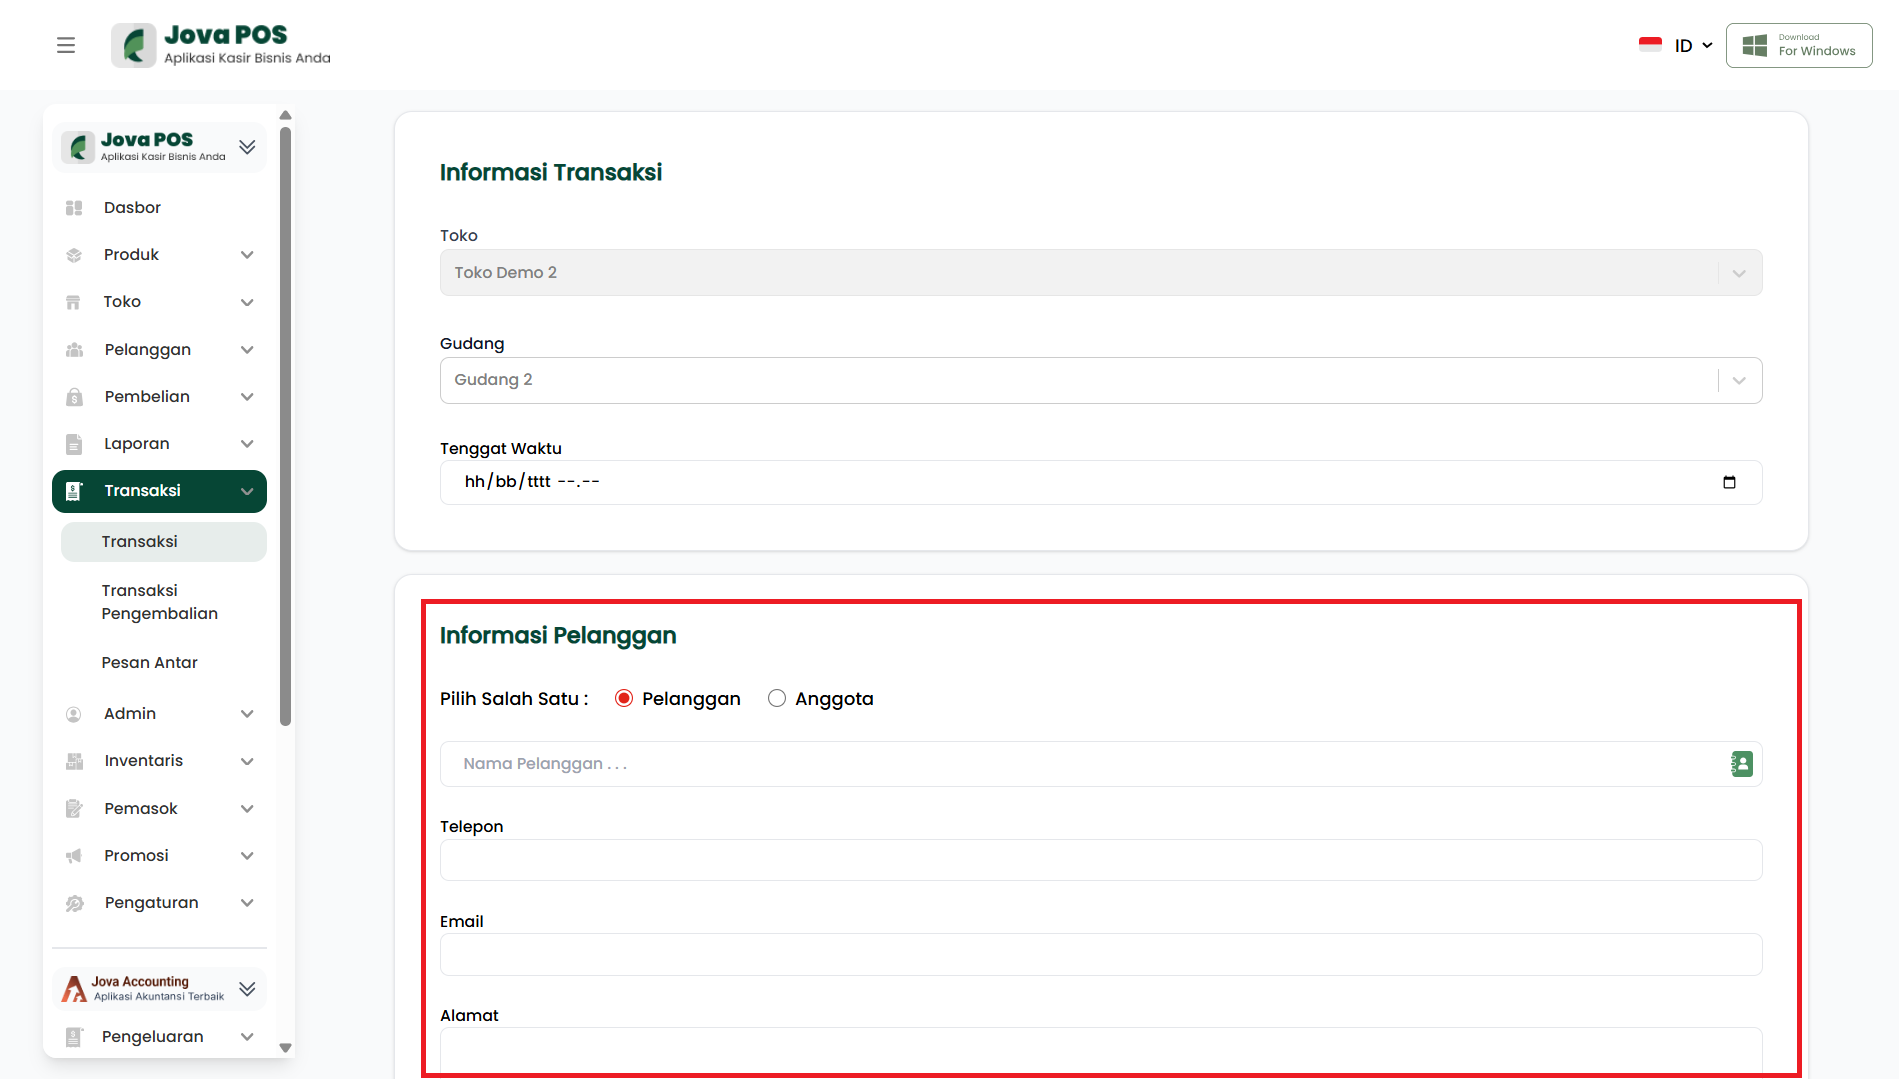
In the Customer Information section, select the buyer's identity type.
-
Select One: Customer / Member
- Customer: for general buyers.
- Member: for members (usually connected to a loyalty program).
-
Search & Select Name
- Click the name search field (example: Adisti).
- Select from the available list.
-
After selection, customer data will typically be filled in such as:
- Phone
- Address
If the customer name doesn't exist yet, add it first through the Customers menu (if your system requires stored customer data).
Step 5 — Add Products to Transaction
Go to the Product Information section.
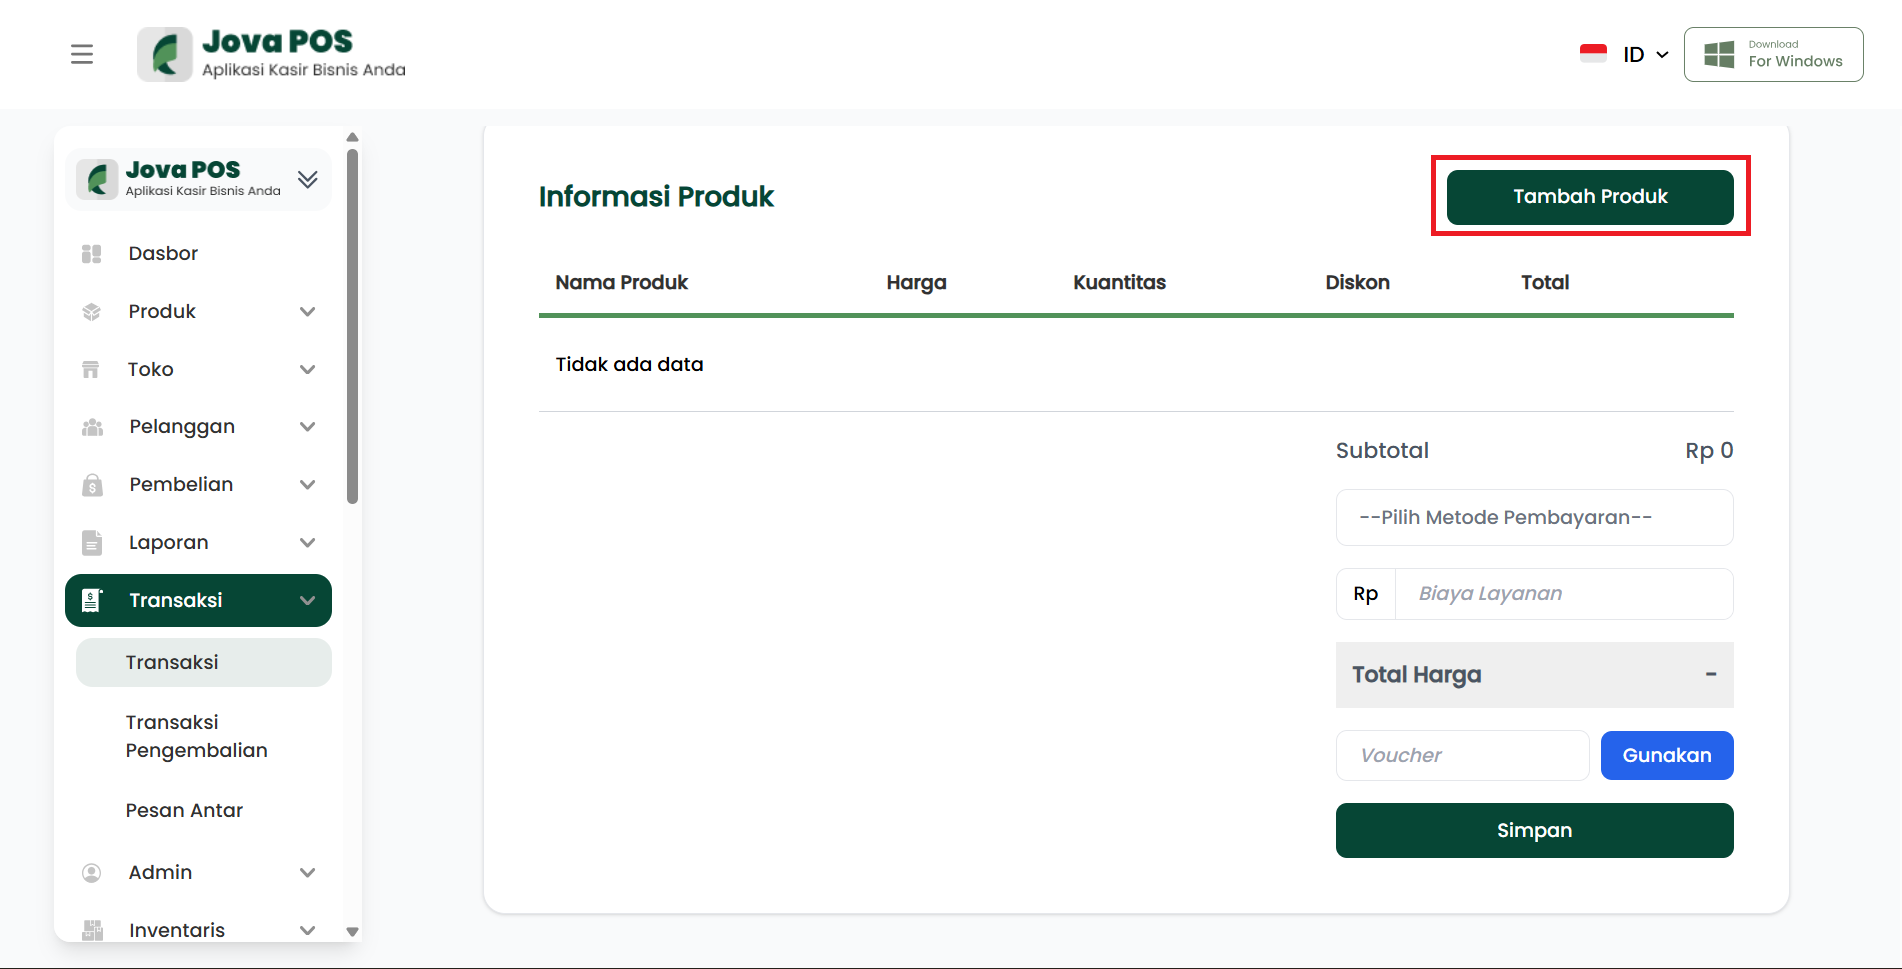
- Click the Add Product button (top right of the product table).
- The system displays the Add Product modal/popup.
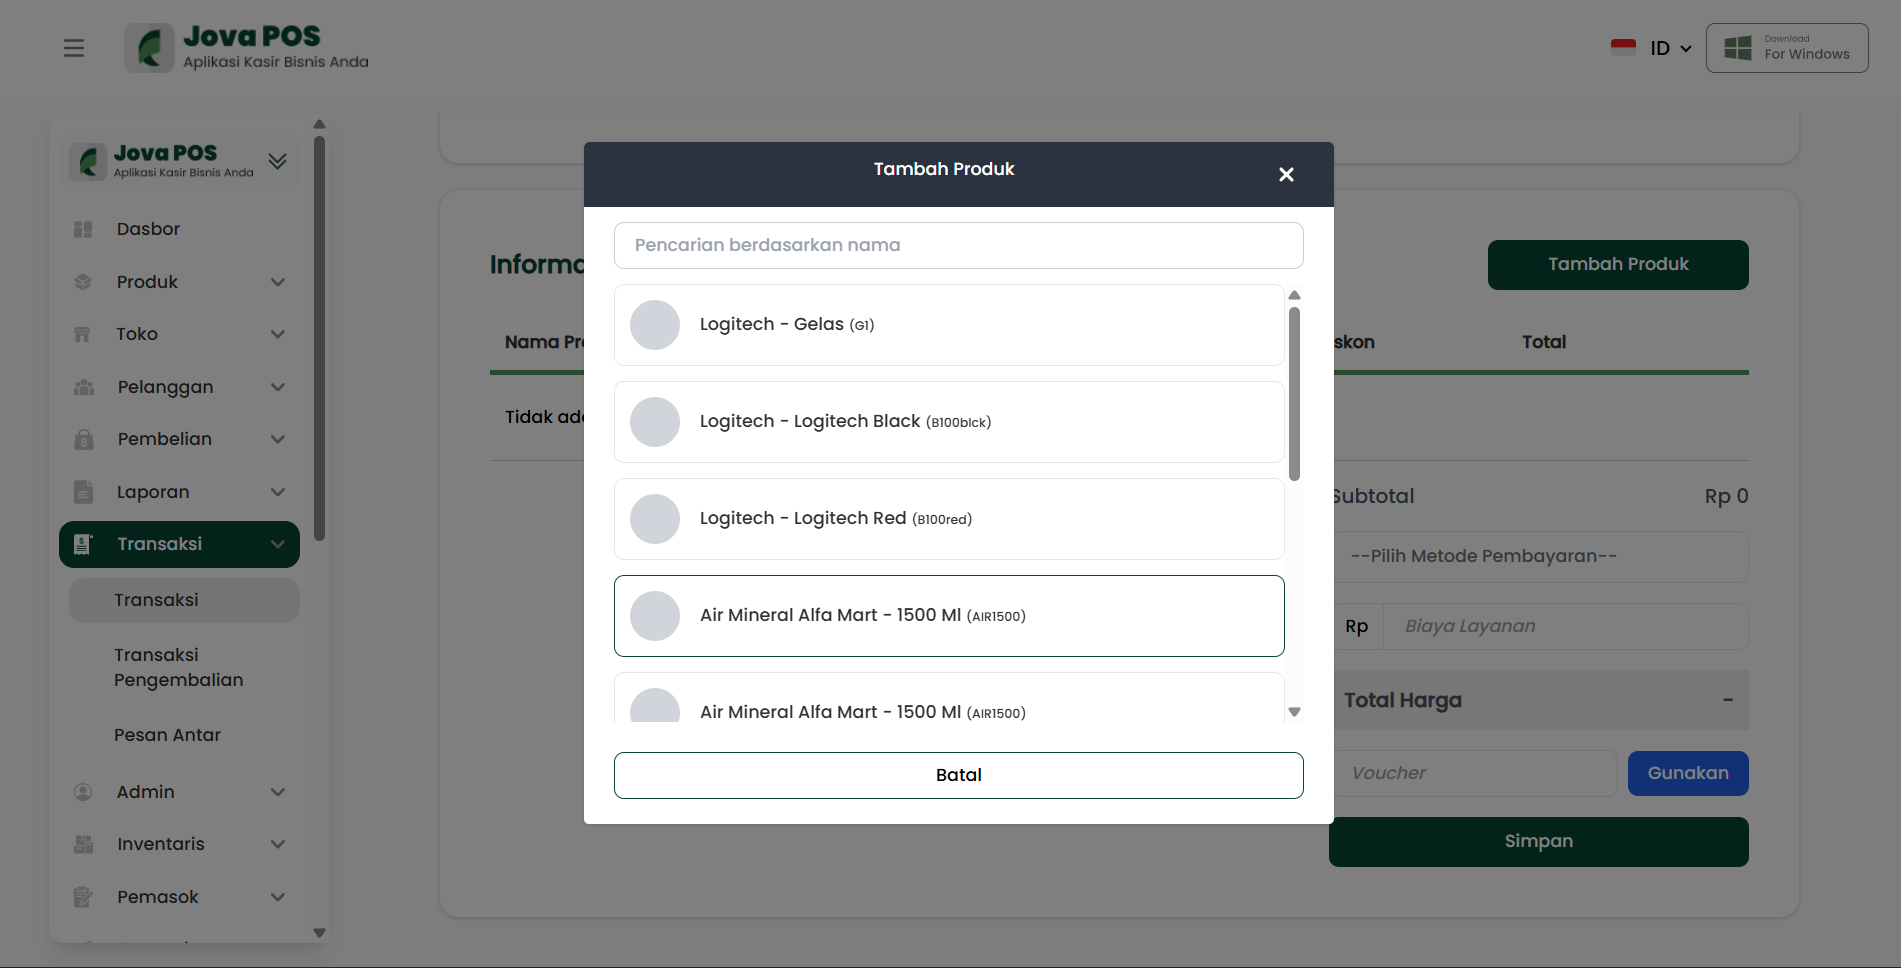
In the Add Product modal, check and fill in:
-
Name
- Usually auto-filled according to the selected product (example: Logitech Black).
-
Qty
- Enter the product quantity (example: 10).
-
Unit
- Auto-filled according to the product (example: Pcs).
-
Unit Cost
- Enter/check the unit price (example: 80,000).
-
Subtotal
- The system calculates automatically (Qty × Unit Cost).
-
Click Add to add the product to the transaction list.
Click Cancel if you want to close the modal without saving changes.
Step 6 — Adjust Qty/Price/Discount per Product (If Needed)
After products are added to the table, you can make adjustments directly on the product row.
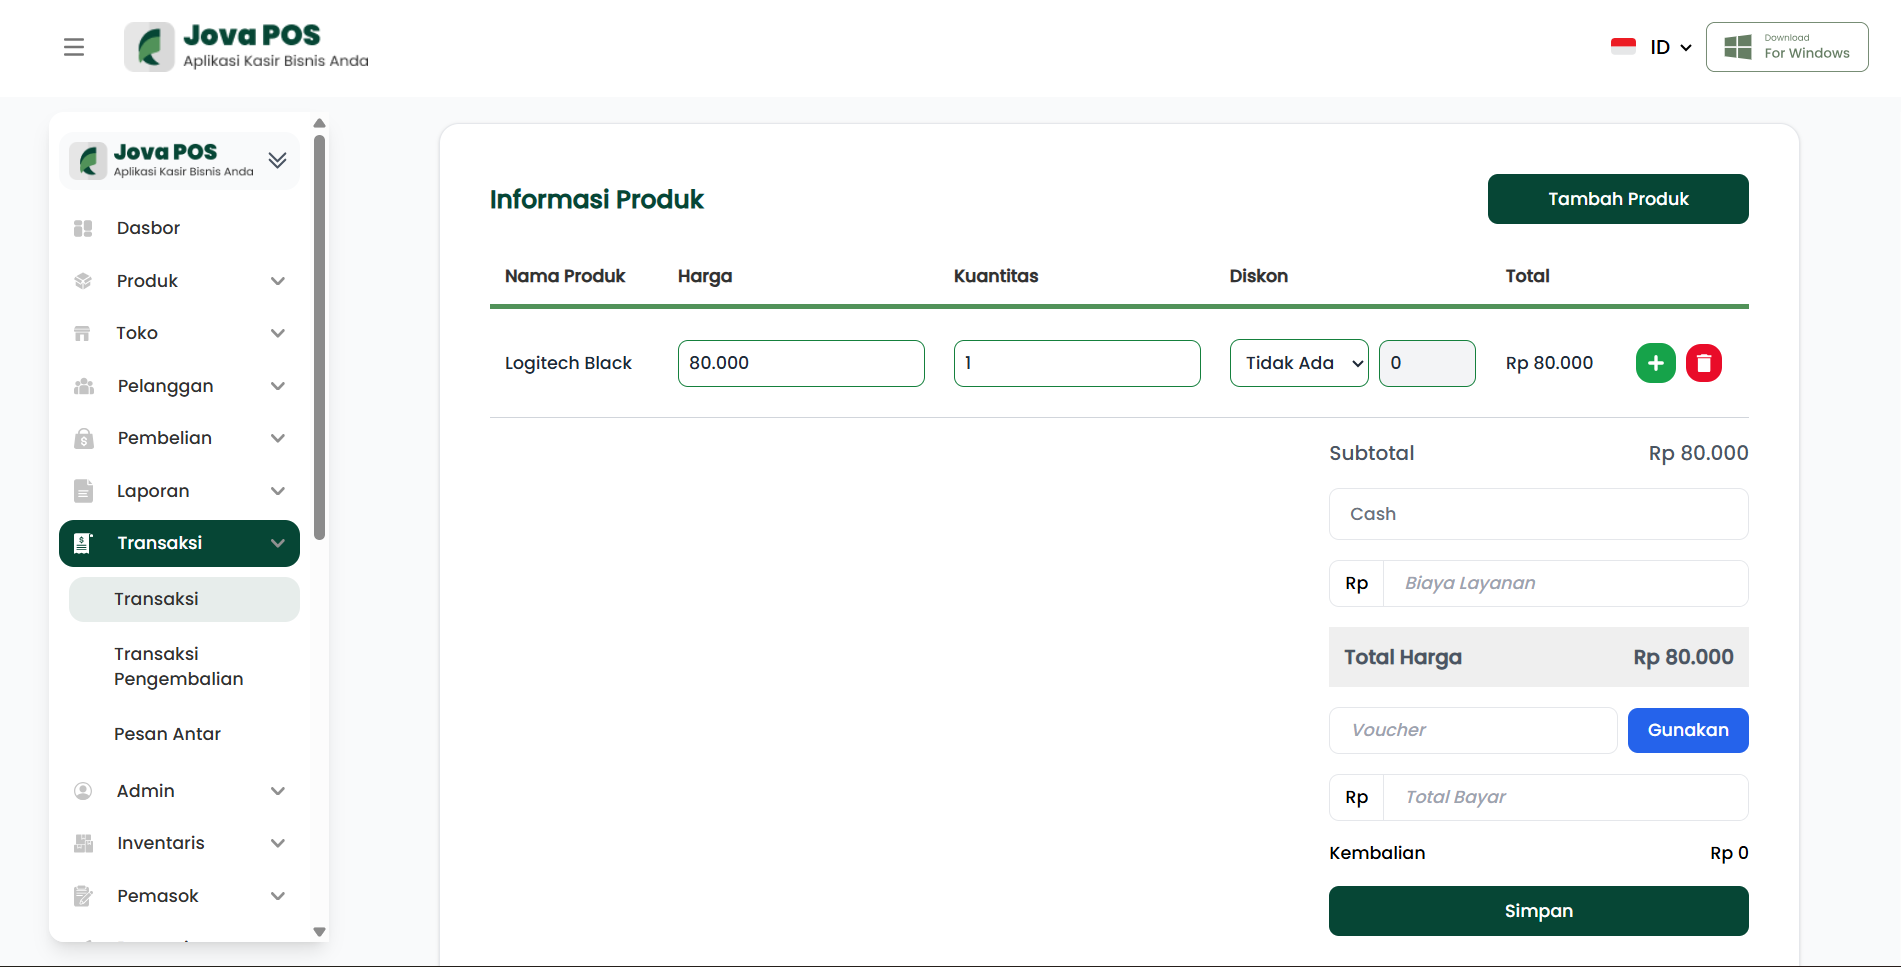
-
Price
- Change if necessary (e.g., special pricing).
-
Quantity
- Adjust the quantity of items.
-
Discount
- Select the discount type (example: None).
- Fill in the discount value if the discount feature is enabled.
-
Total
- The system displays the total per line (calculated after discount if applicable).
-
Action Icons on Product Row
- ( + ) green button: add/duplicate product row (as per your application implementation).
- Delete red button: remove product from transaction.
Make sure items not being purchased are removed so subtotal and total price are accurate.
Step 7 — Select Payment Method & Fill in Payment
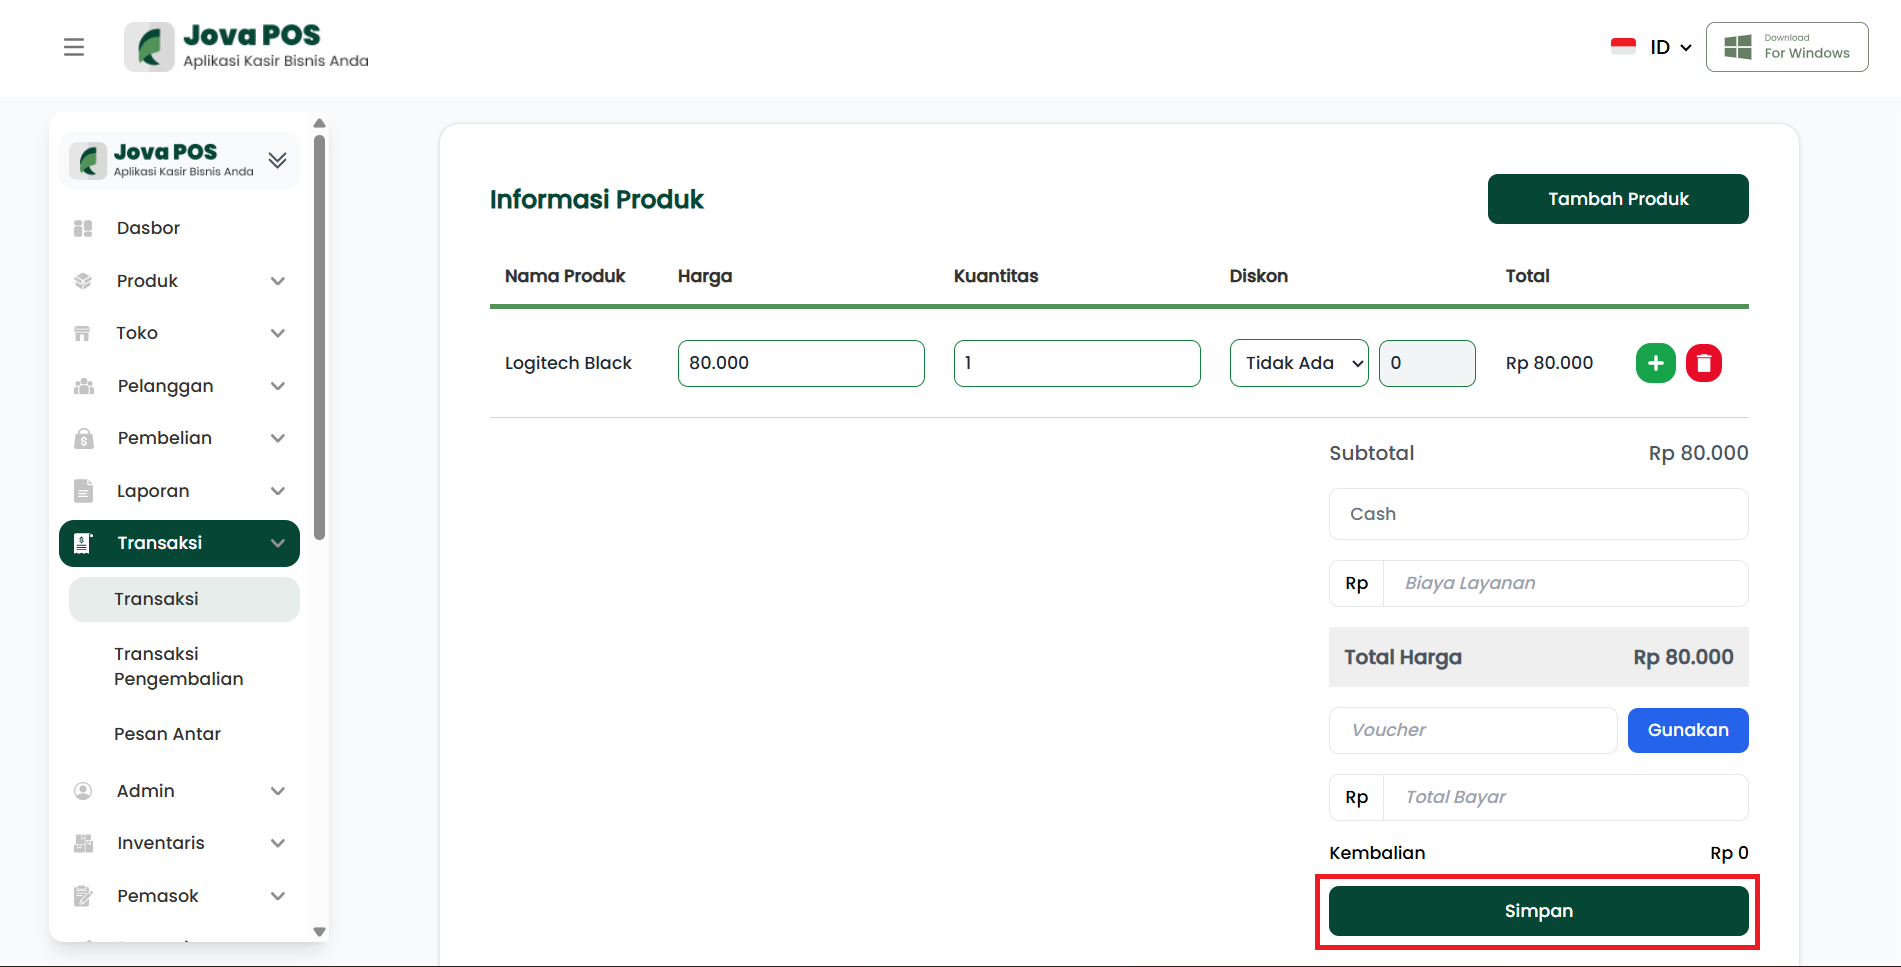
In the right panel (payment summary), configure the payment.
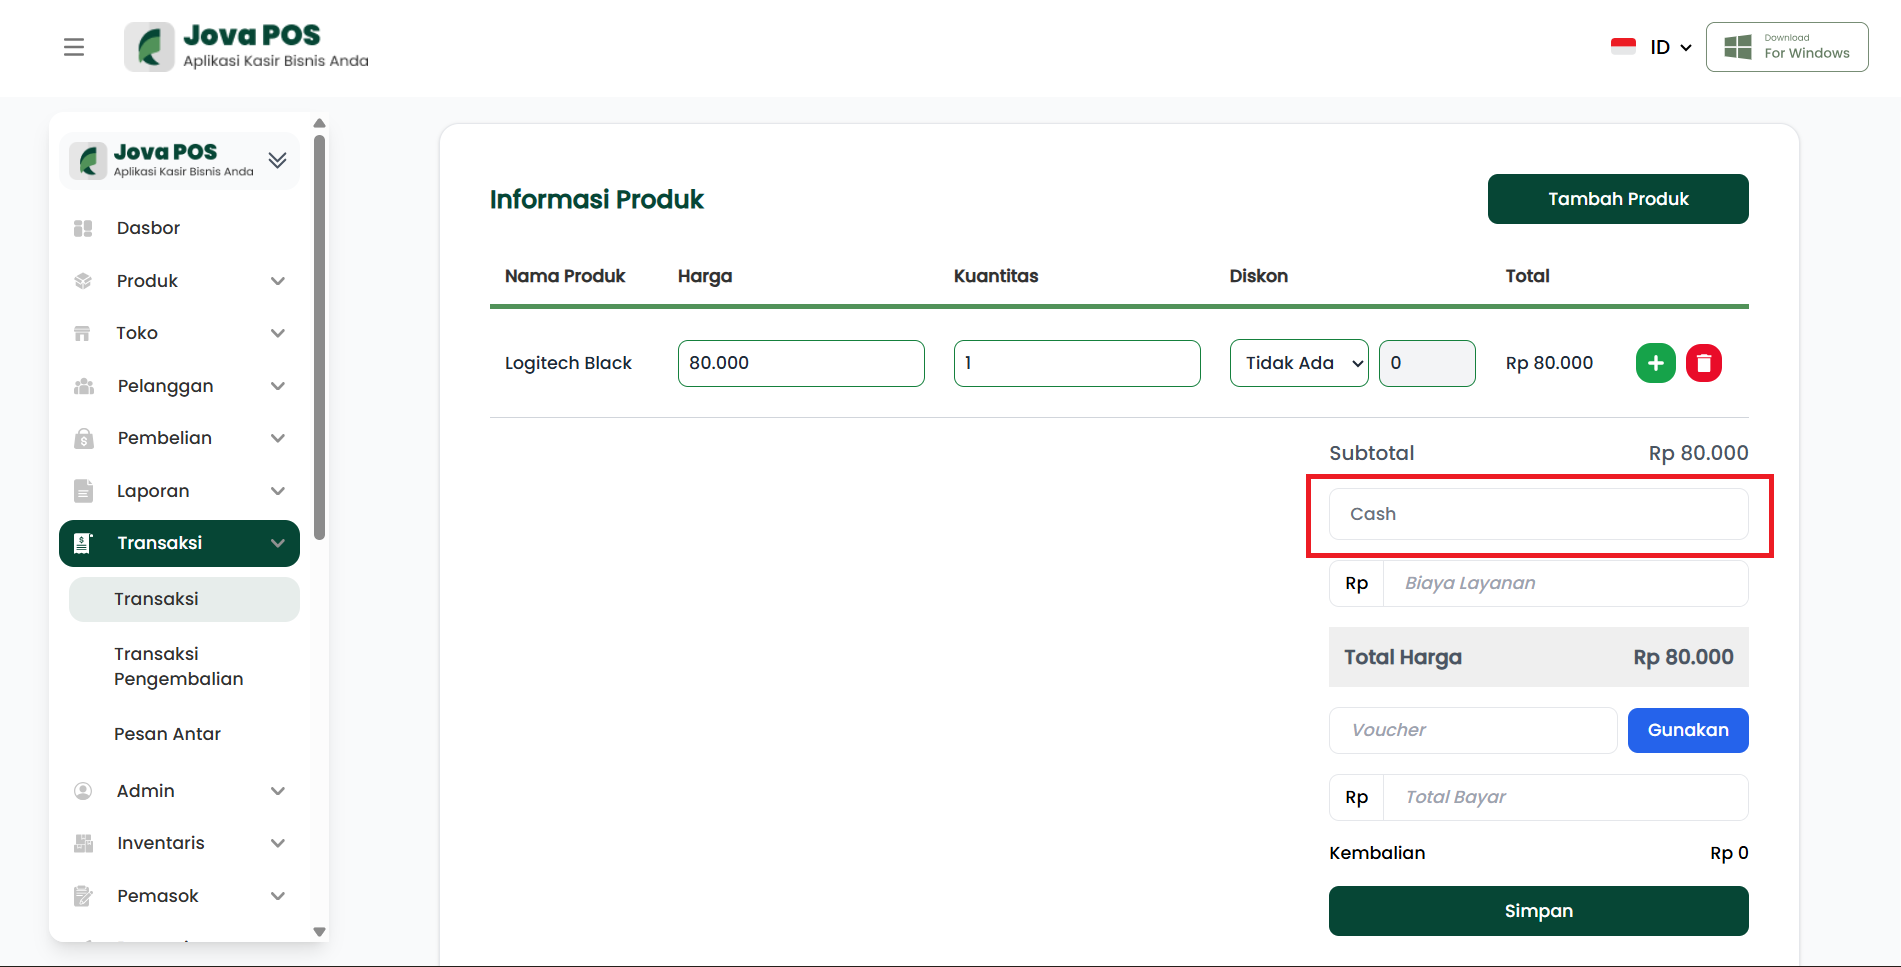
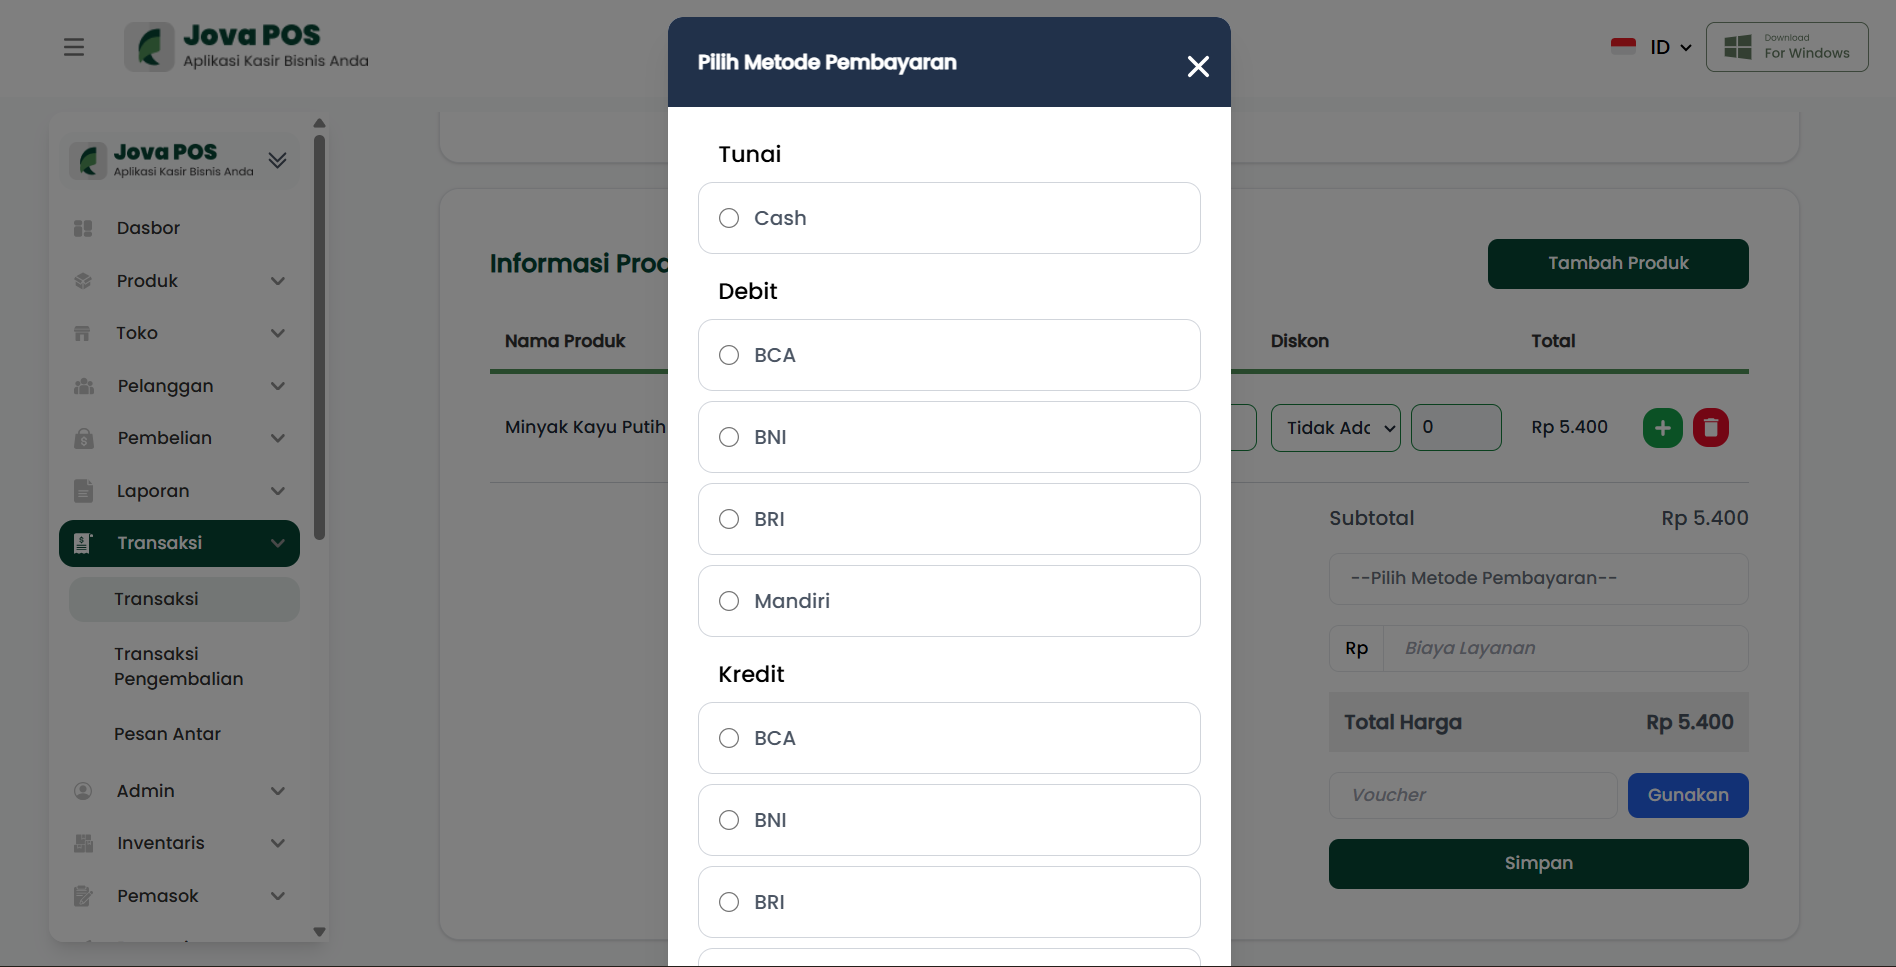
-
Subtotal
- Auto-calculated from the total of all items.
-
Payment Method
- Select the payment method (example: Cash).
- If other methods are available, select according to the transaction.
-
Service Fee
- Fill in if there are additional fees (e.g., service/administration fee).
- If none, leave as 0/empty according to system guidelines.
-
Total Price
- Auto-calculated (Subtotal + Service Fee − Discount/Voucher).
-
Voucher (Optional)
- Enter the voucher code in the Voucher field.
- Click Apply to apply the voucher.
- After the voucher is applied, the total price will adjust (according to voucher rules).
-
Total Paid
- Enter the amount paid by the customer.
-
Change
- The system calculates automatically: Total Paid − Total Price.
If the change is 0, the payment is exact. If negative (or cannot be saved), it's usually because Total Paid is still less than Total Price.
Step 8 — Save Transaction
- After all data is correct (customer, products, payment), click the Save button.
- The system saves the transaction and typically:
- Creates a Transaction Number
- Changes the status to Completed (or according to your business flow)
- Provides buttons for Print Bill and/or View Invoice
4. Print Bill & View Invoice
After the transaction is saved, you can print or view the invoice.
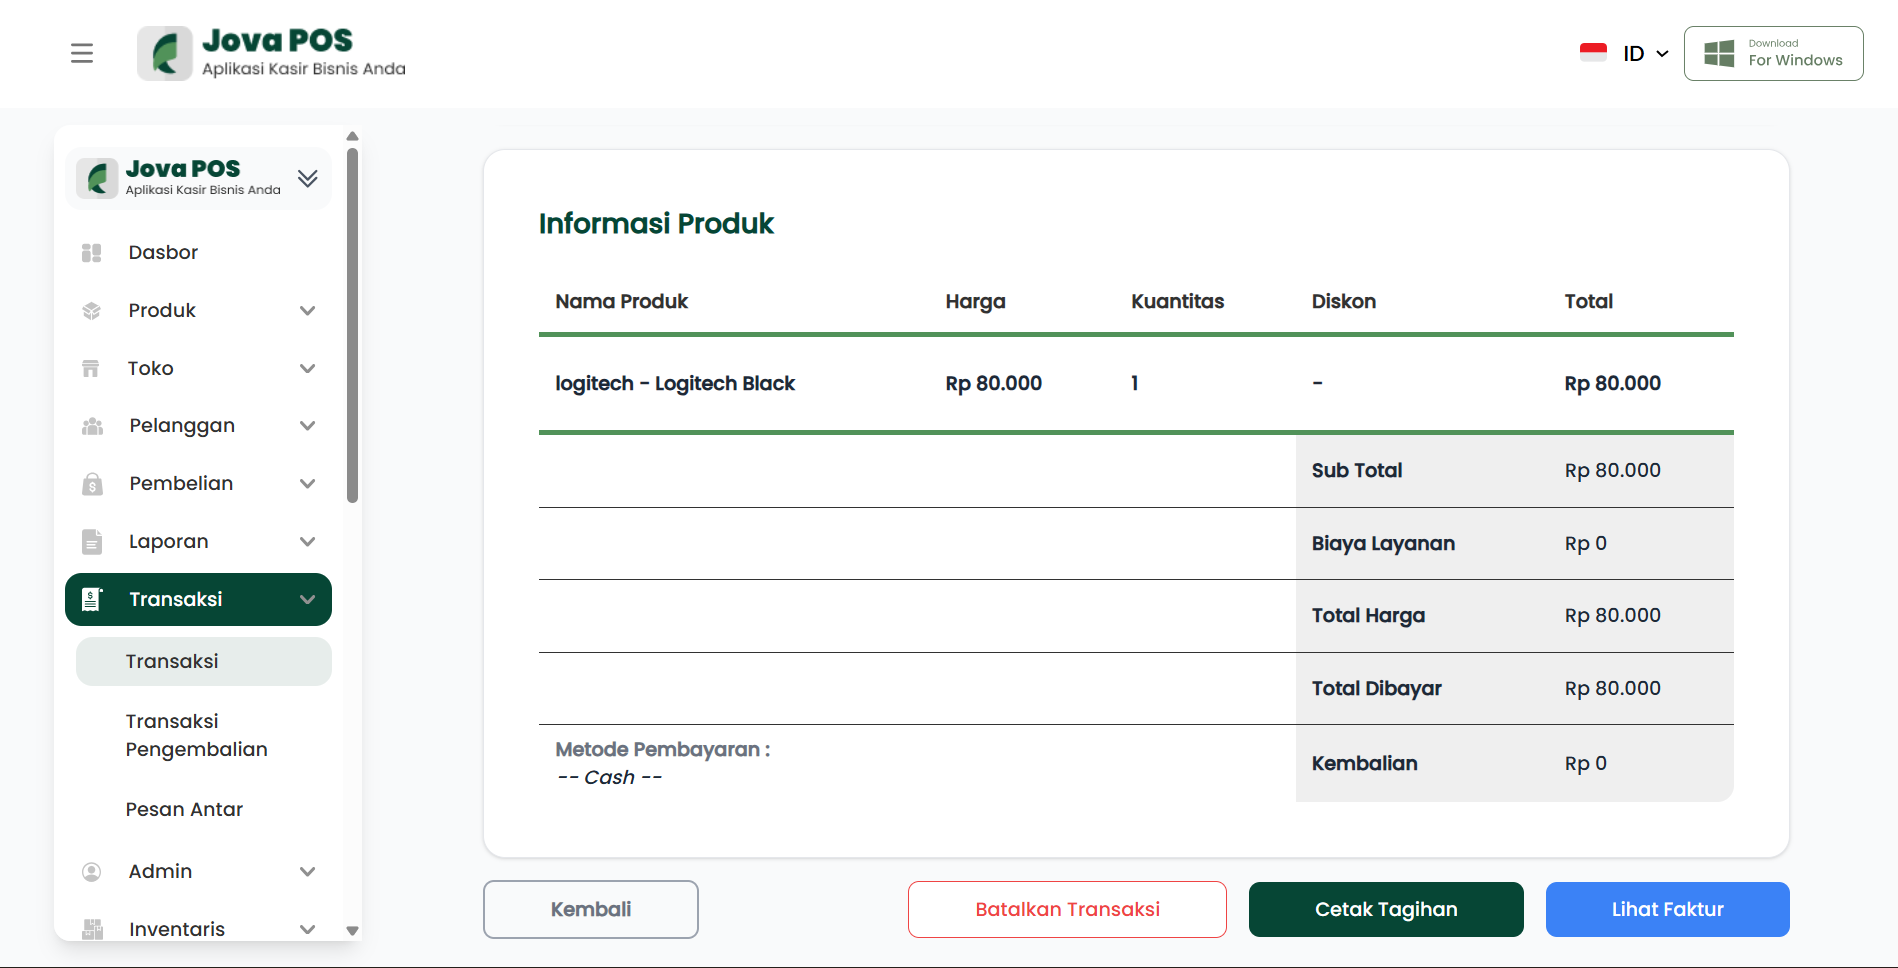
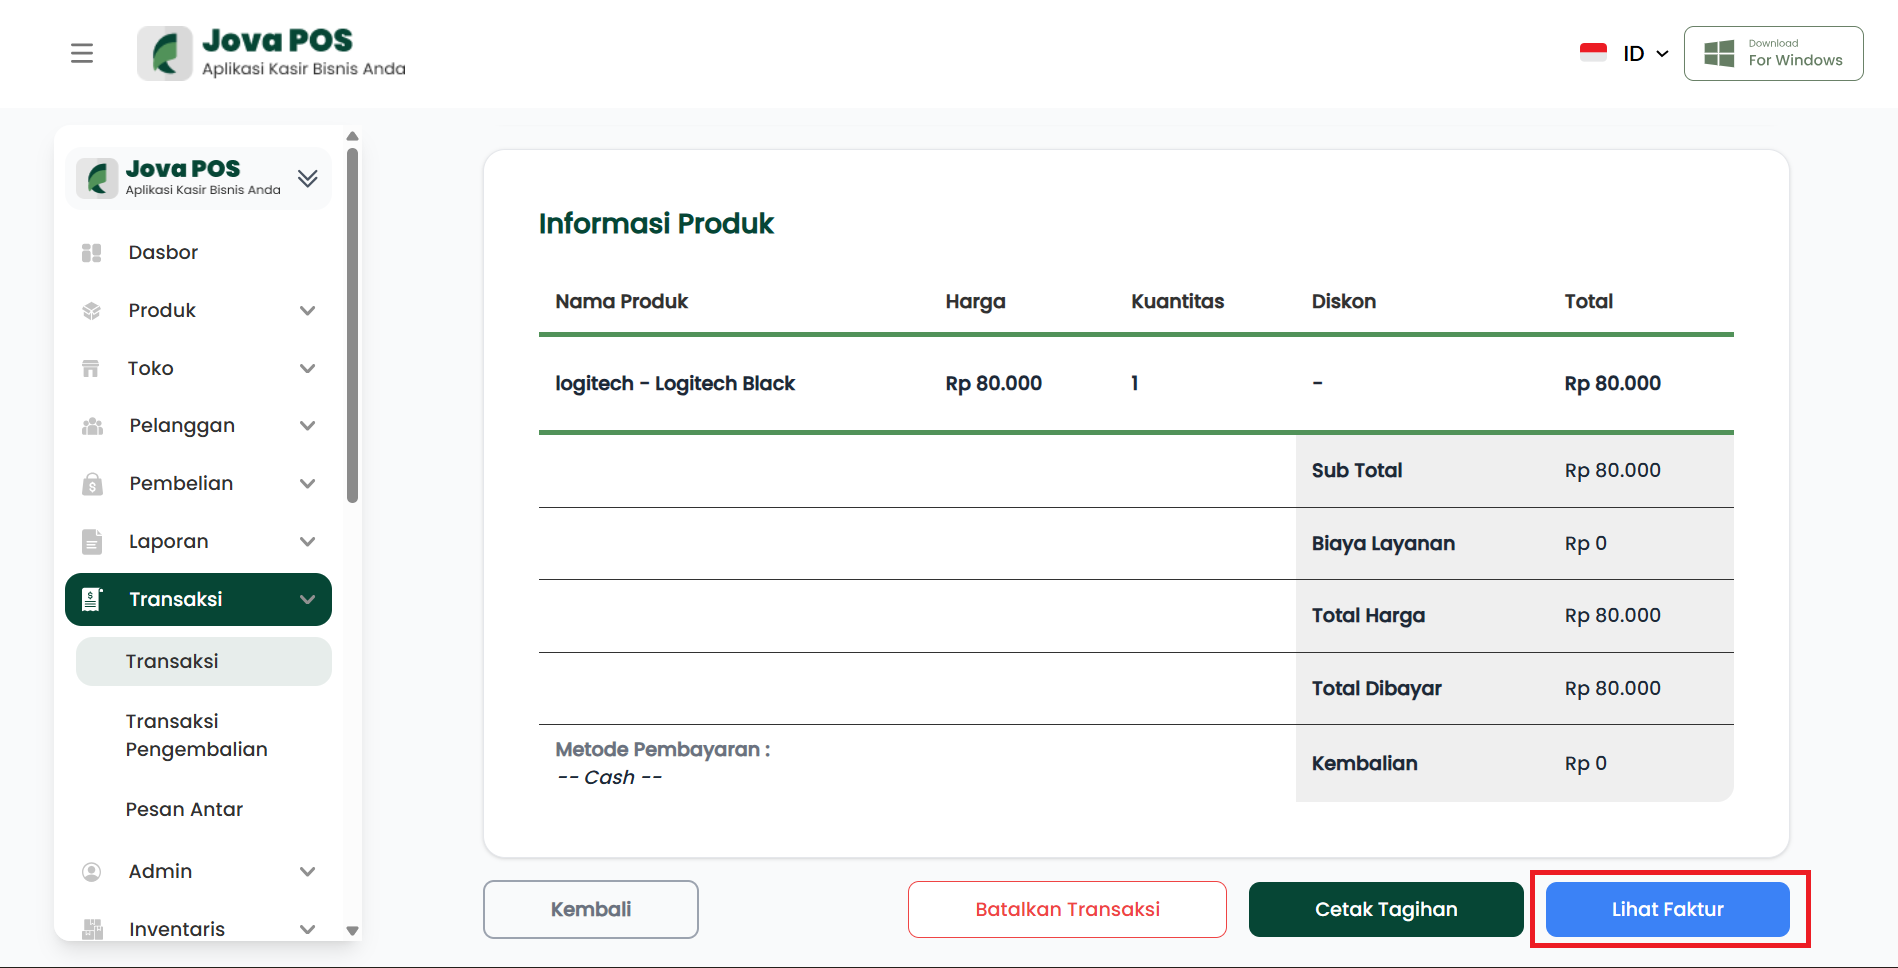
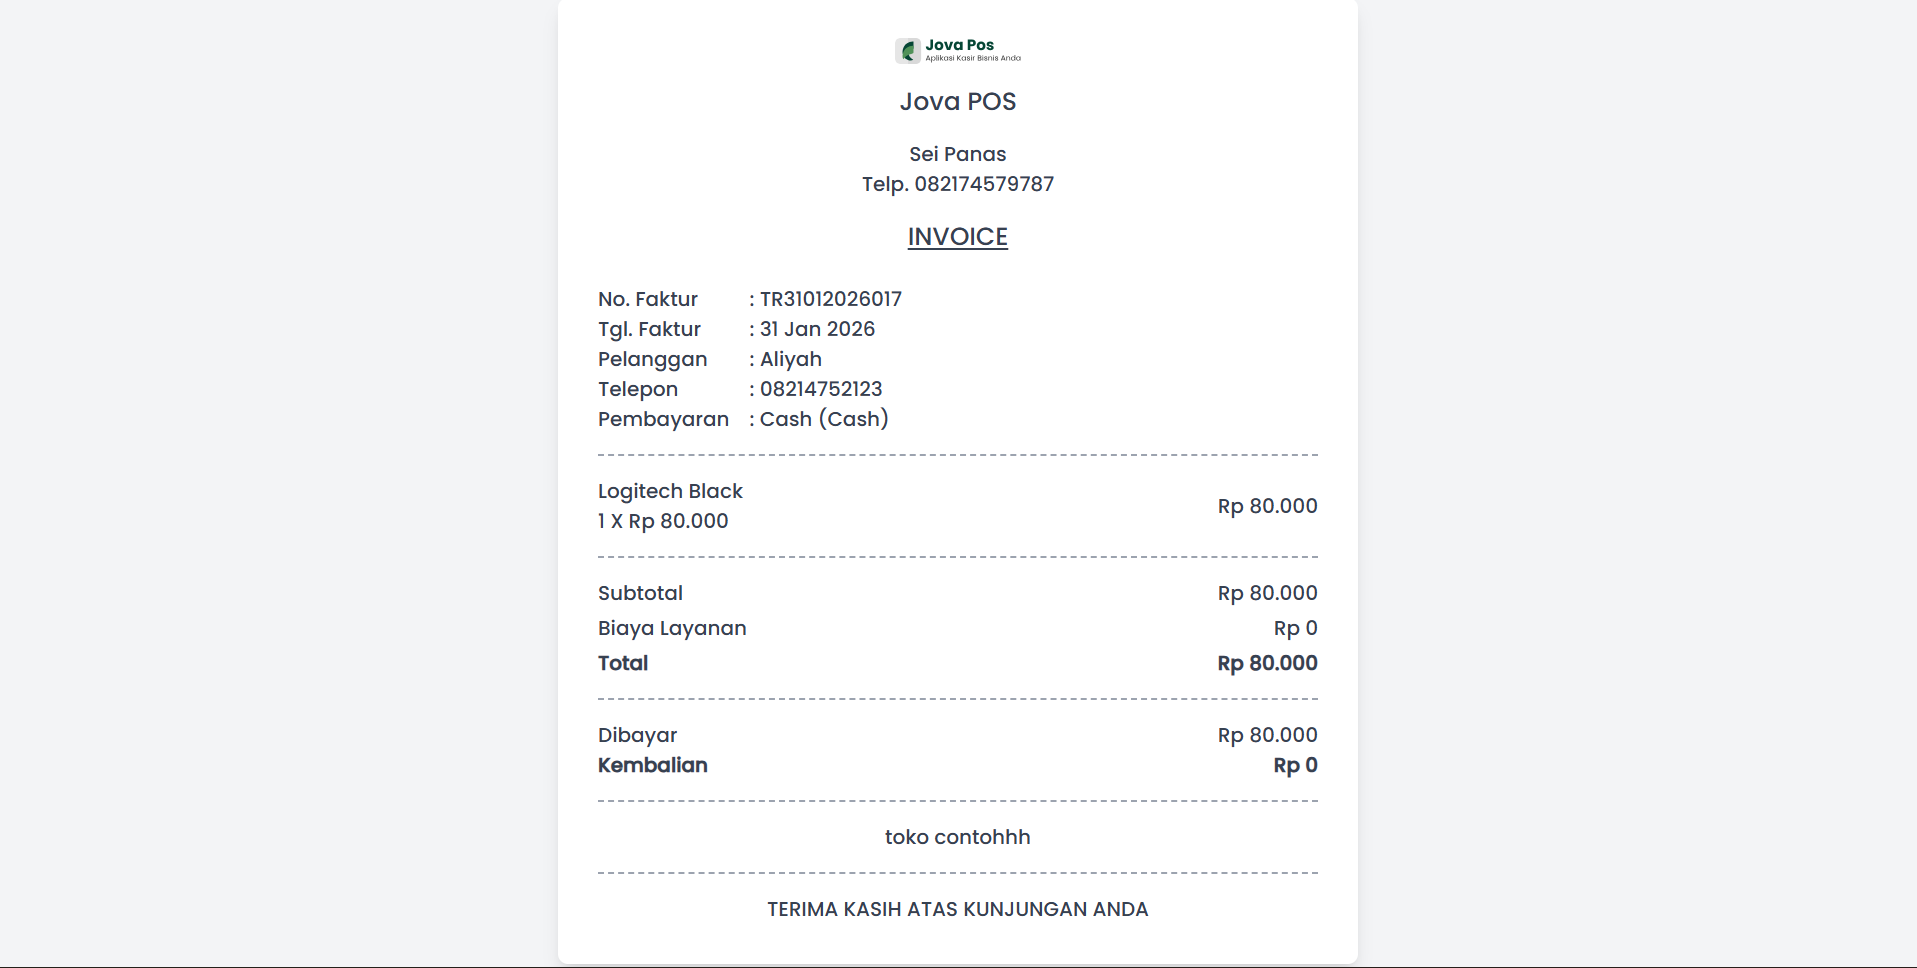
4.1 View Invoice
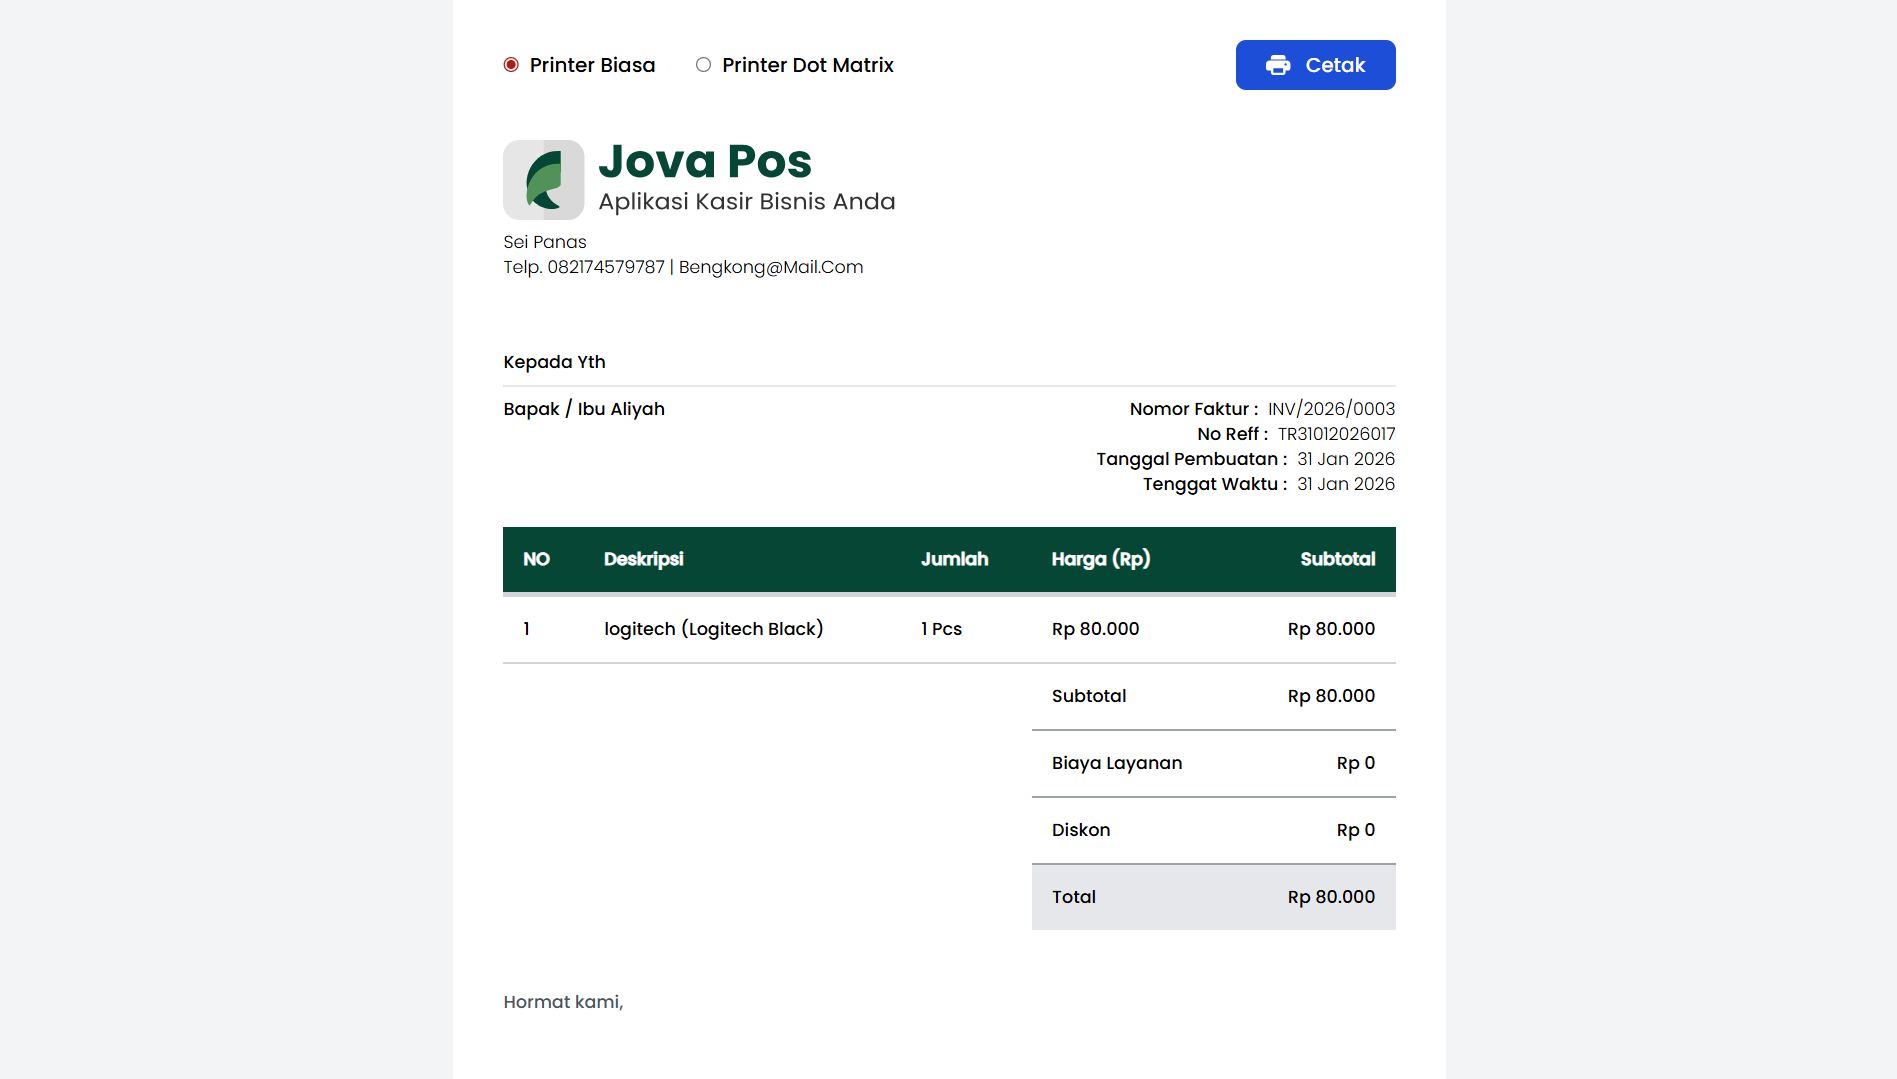
- Click the View Invoice button.
- The system displays the invoice according to the available template.
4.2 Print Bill
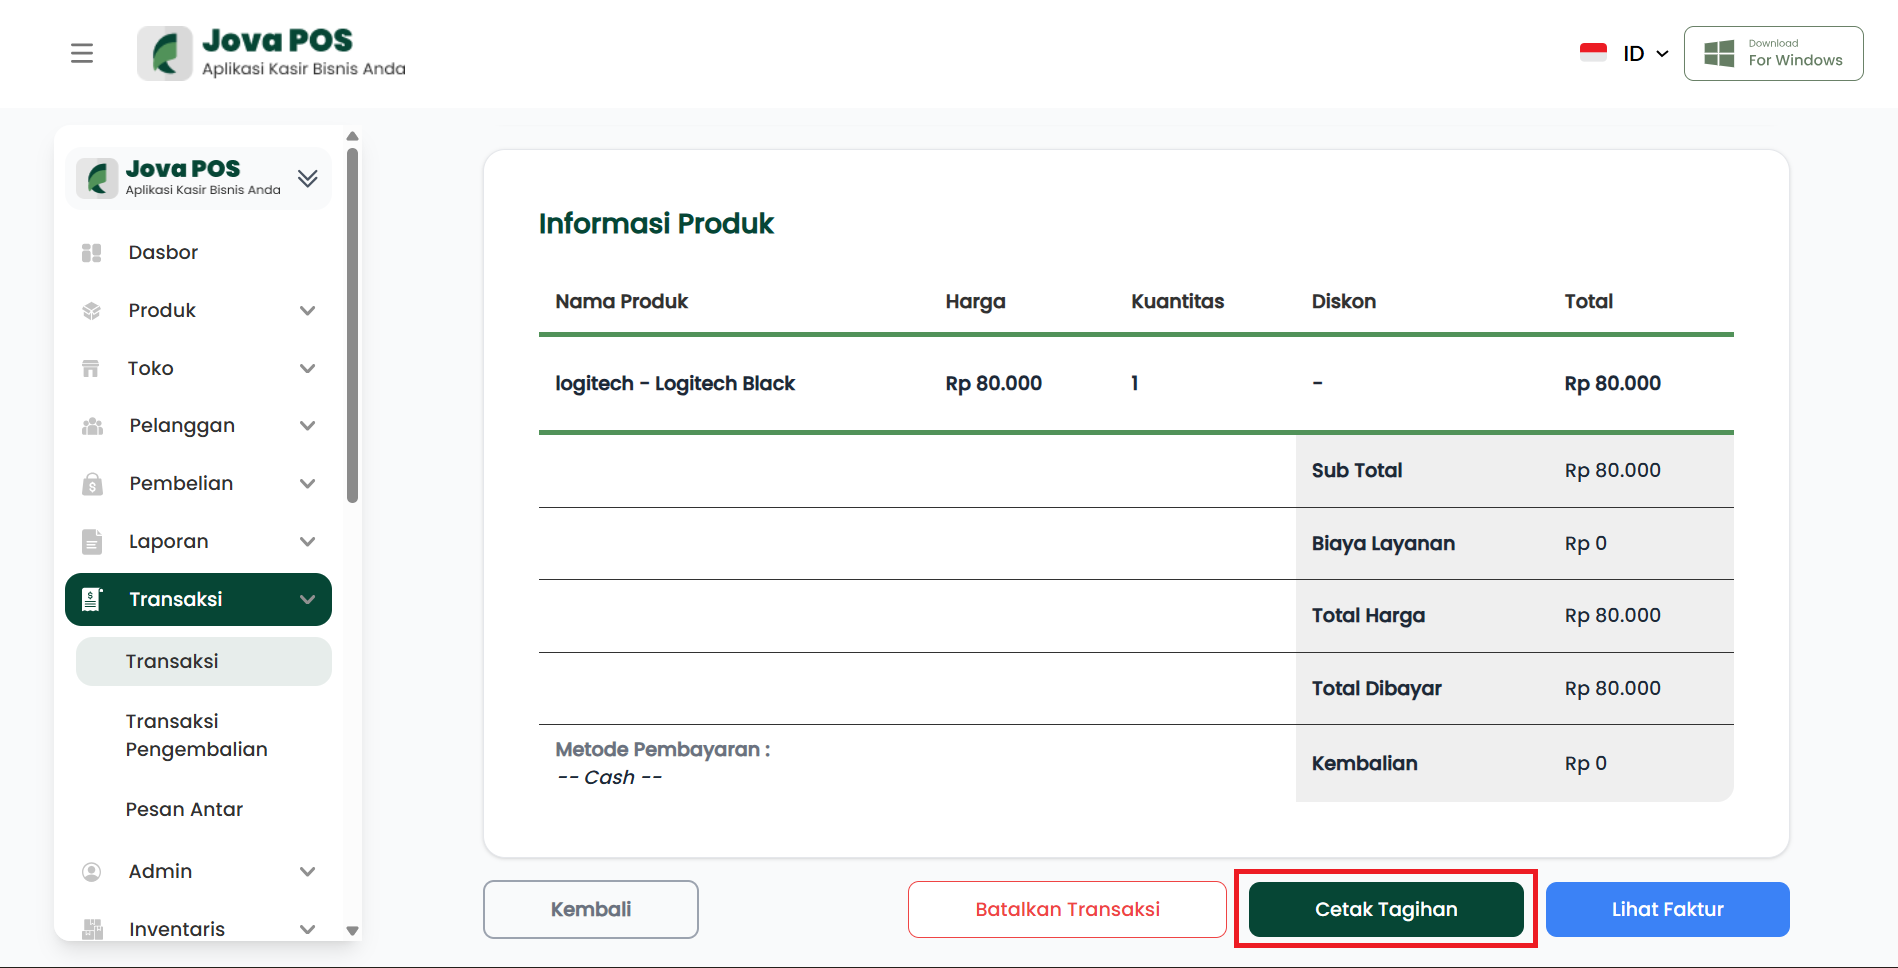
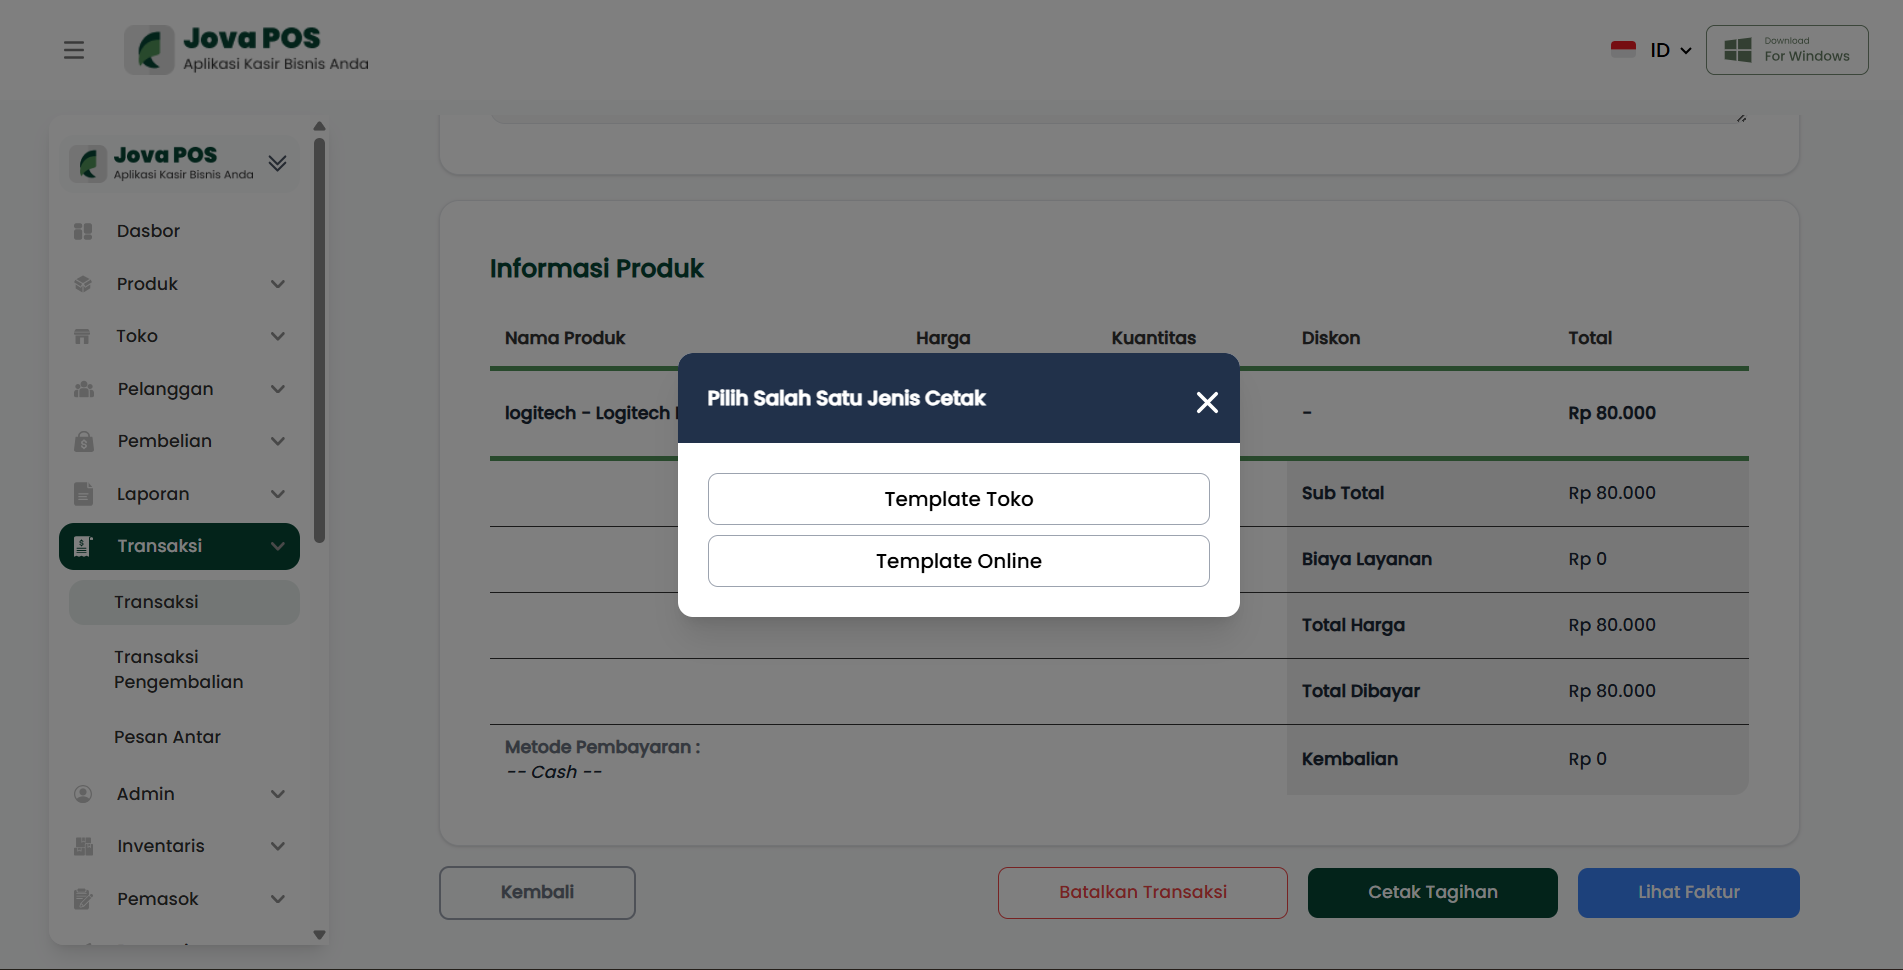
- Click the Print Bill button.
- A popup with print type options appears:
-
Select one:
- Store Template: more complete invoice format (suitable for offline/retail transactions).
- Online Template: more concise format (suitable for online transactions/simple receipts).
-
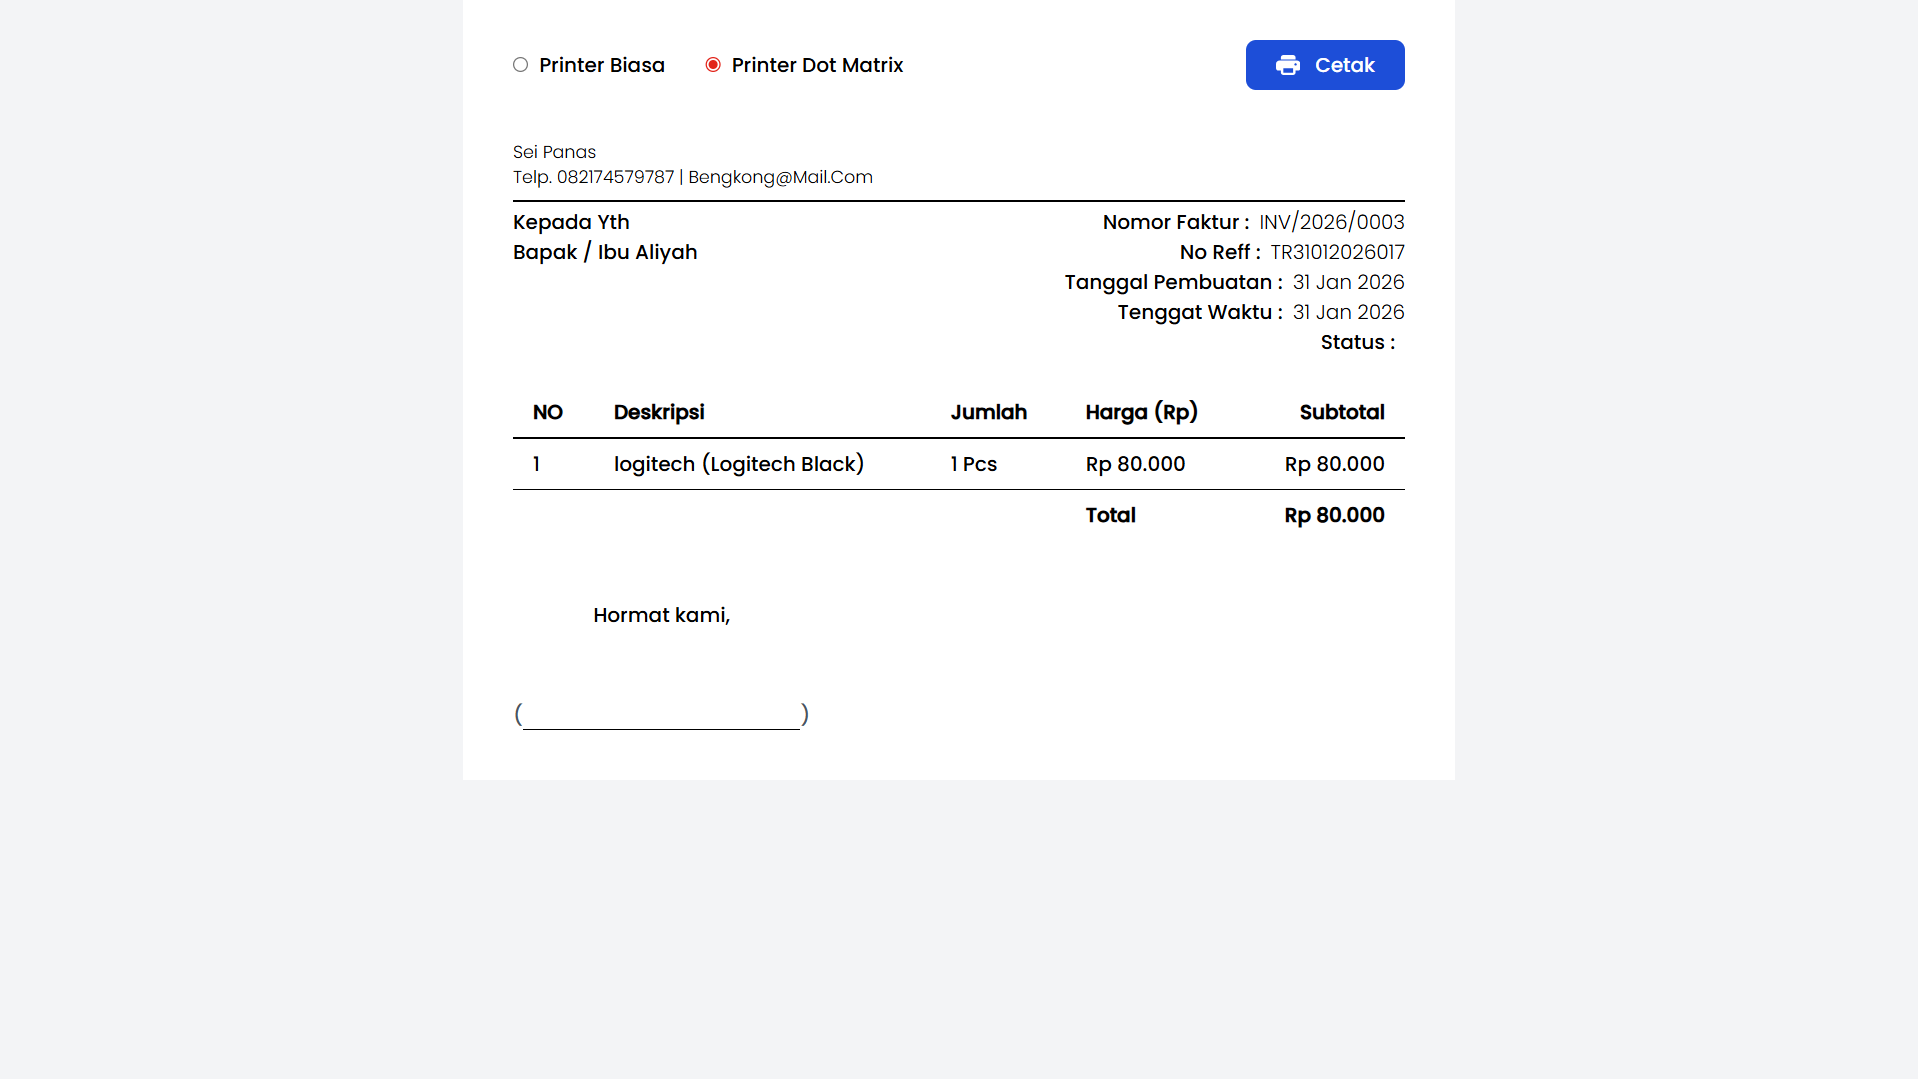
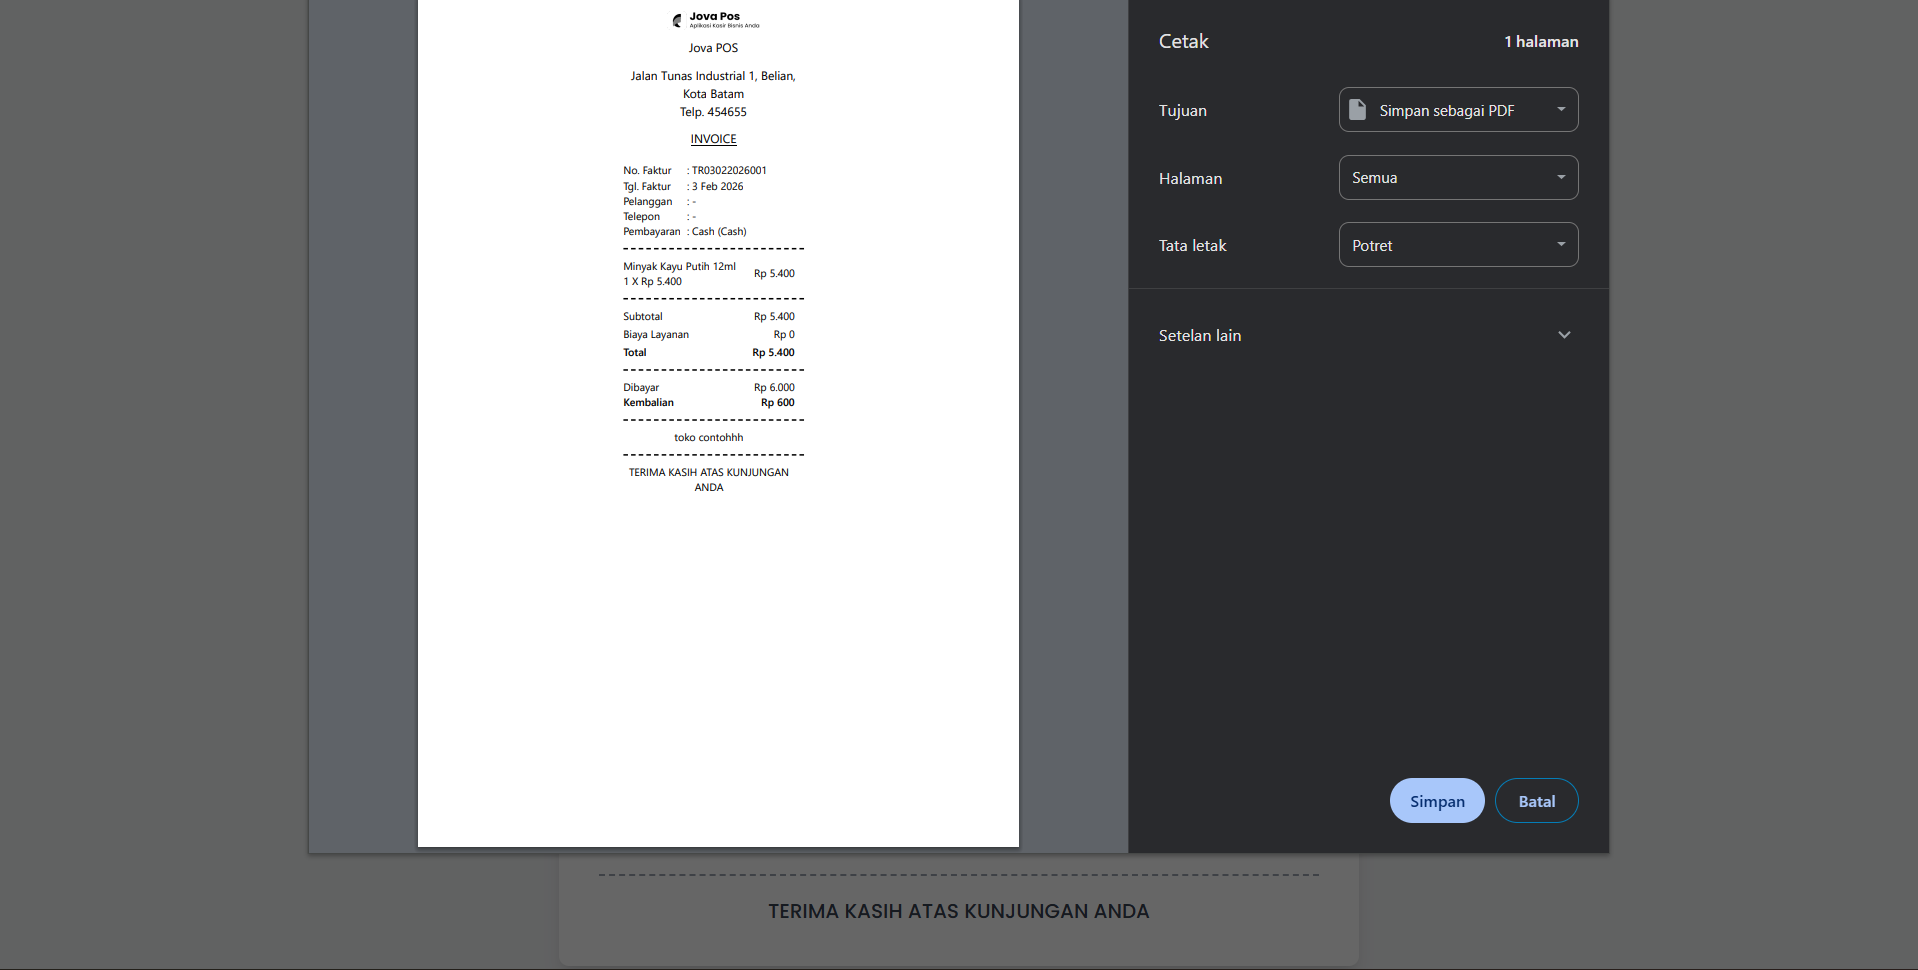
On the print page, select the printer type:
- Regular Printer
- Dot Matrix Printer
-
Click the Print button.
5. Canceling a Transaction
Transaction cancellation in the system is irreversible and usually requires authorization.
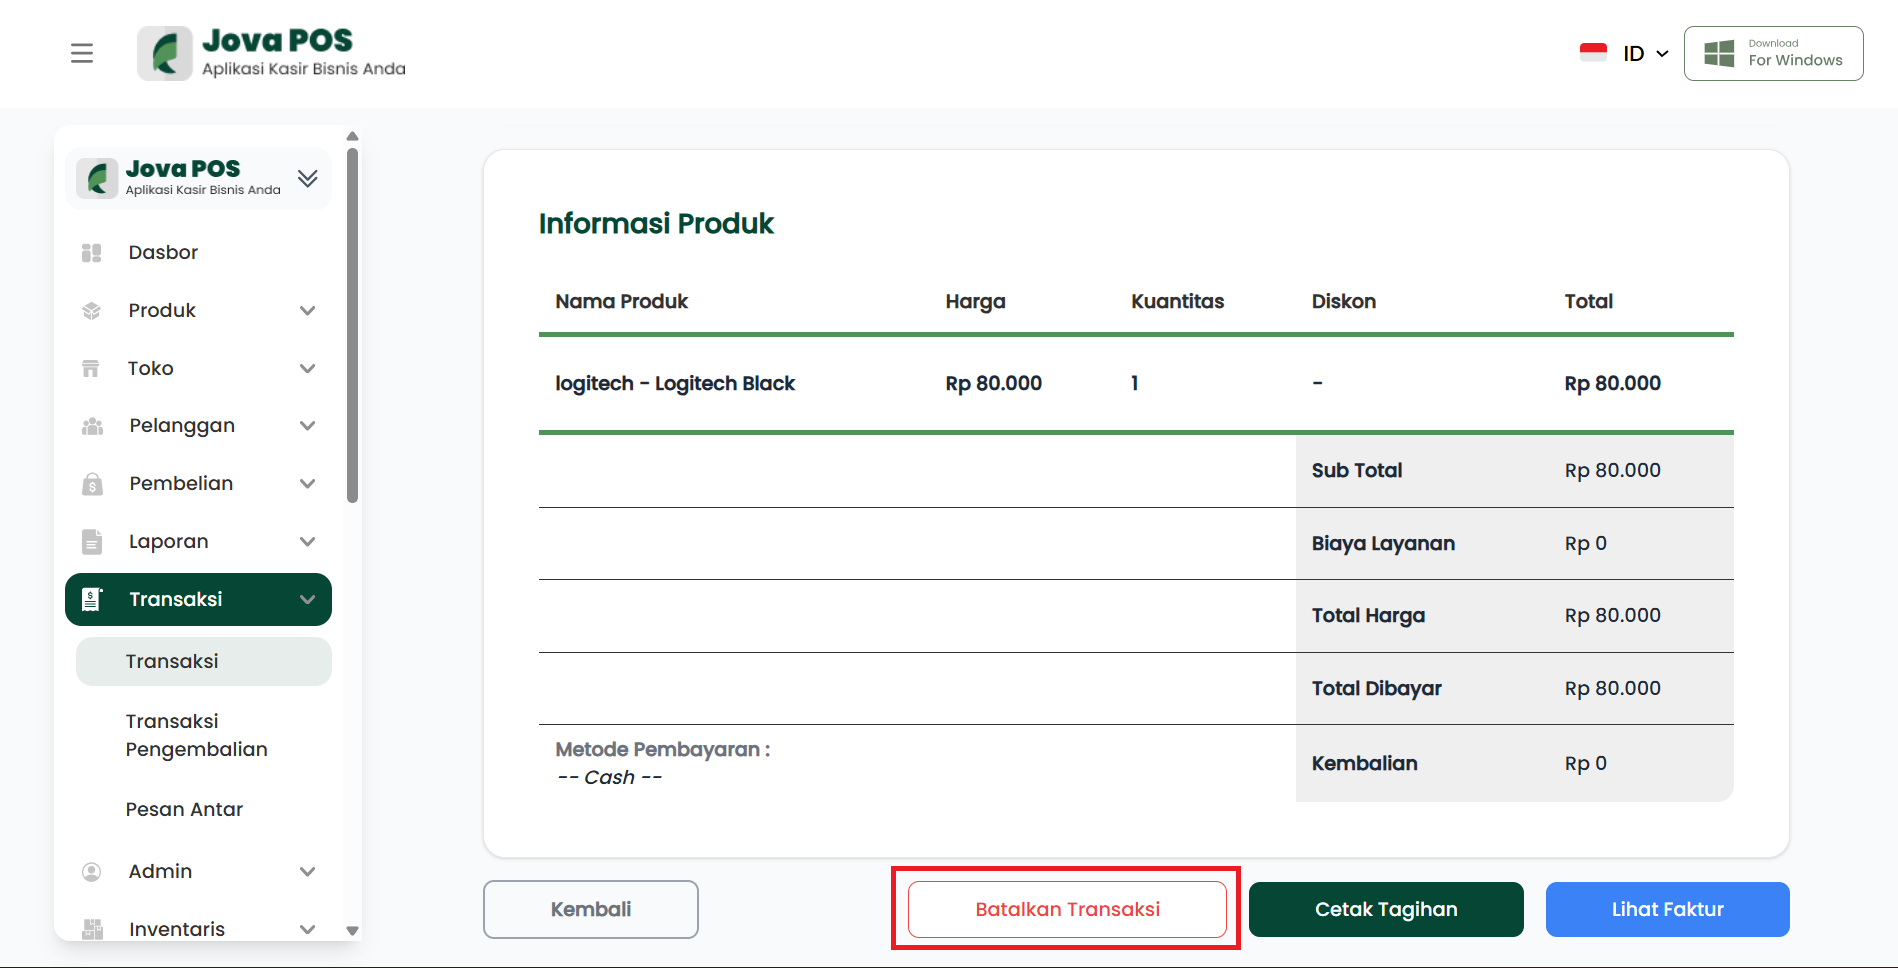
Cancellation steps:
- Open the transaction details.
- Click the Cancel Transaction button.
- A cancellation confirmation popup appears.
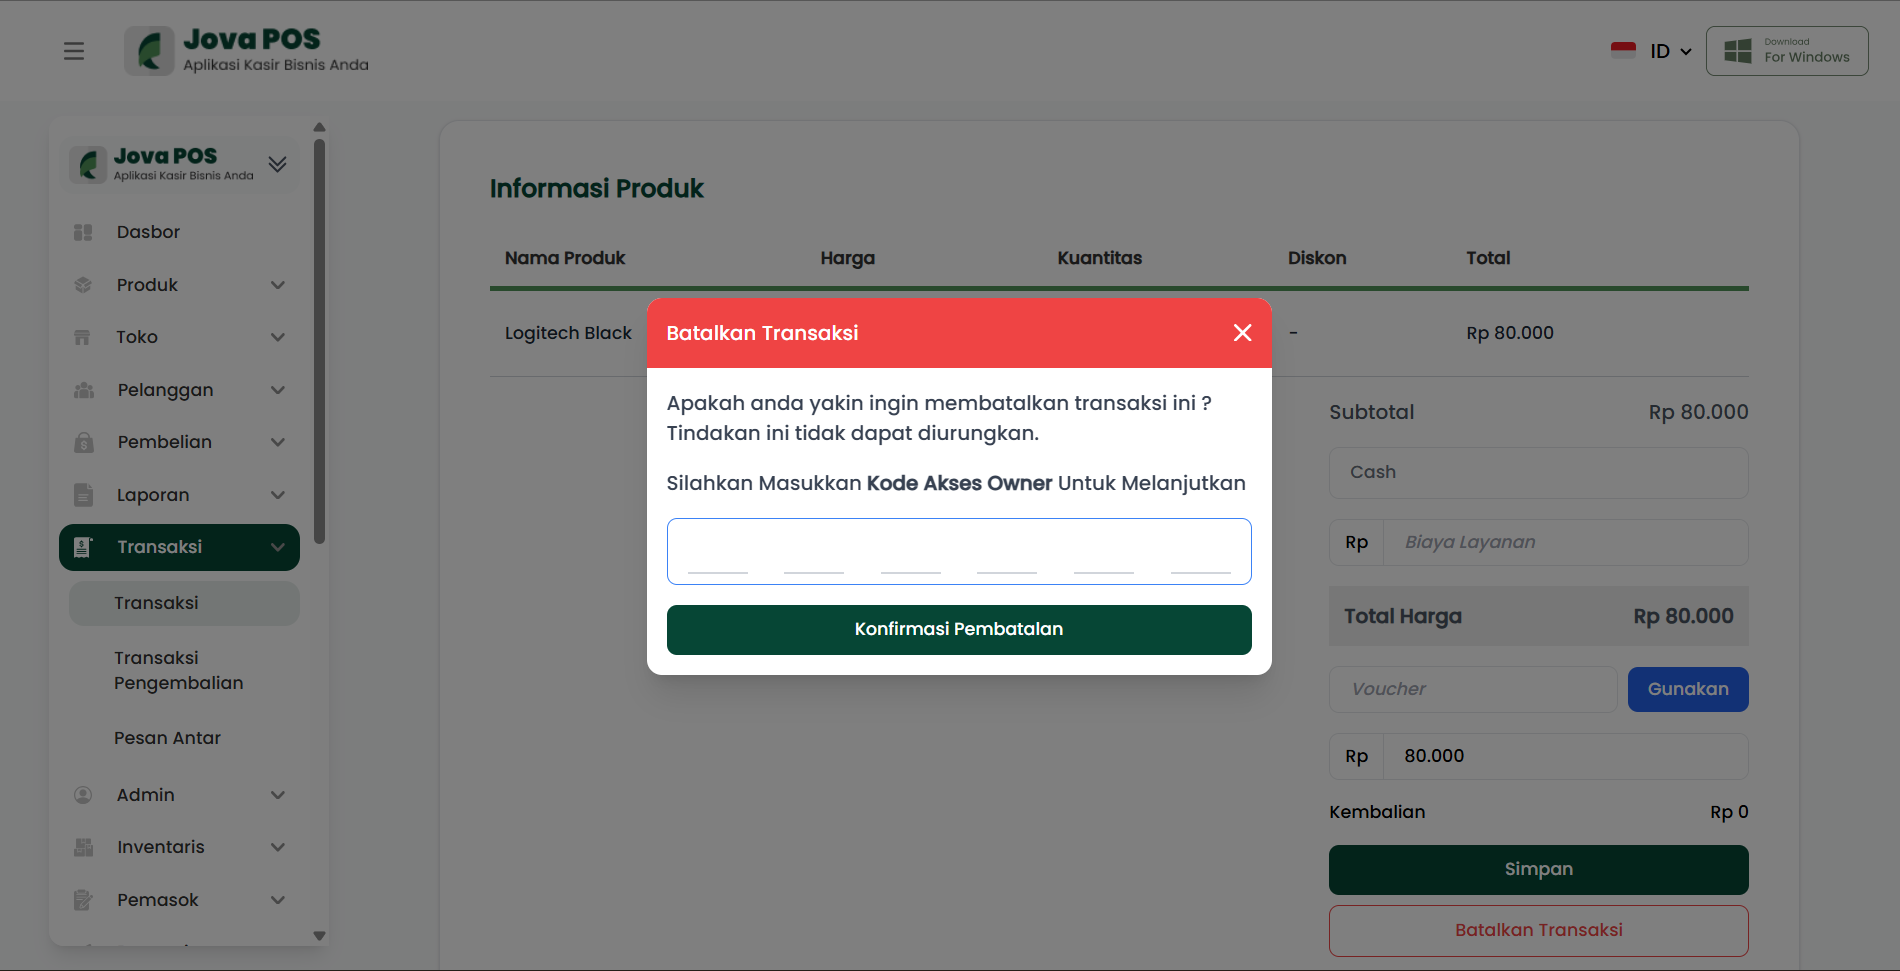
- Enter the Owner Access Code to proceed.
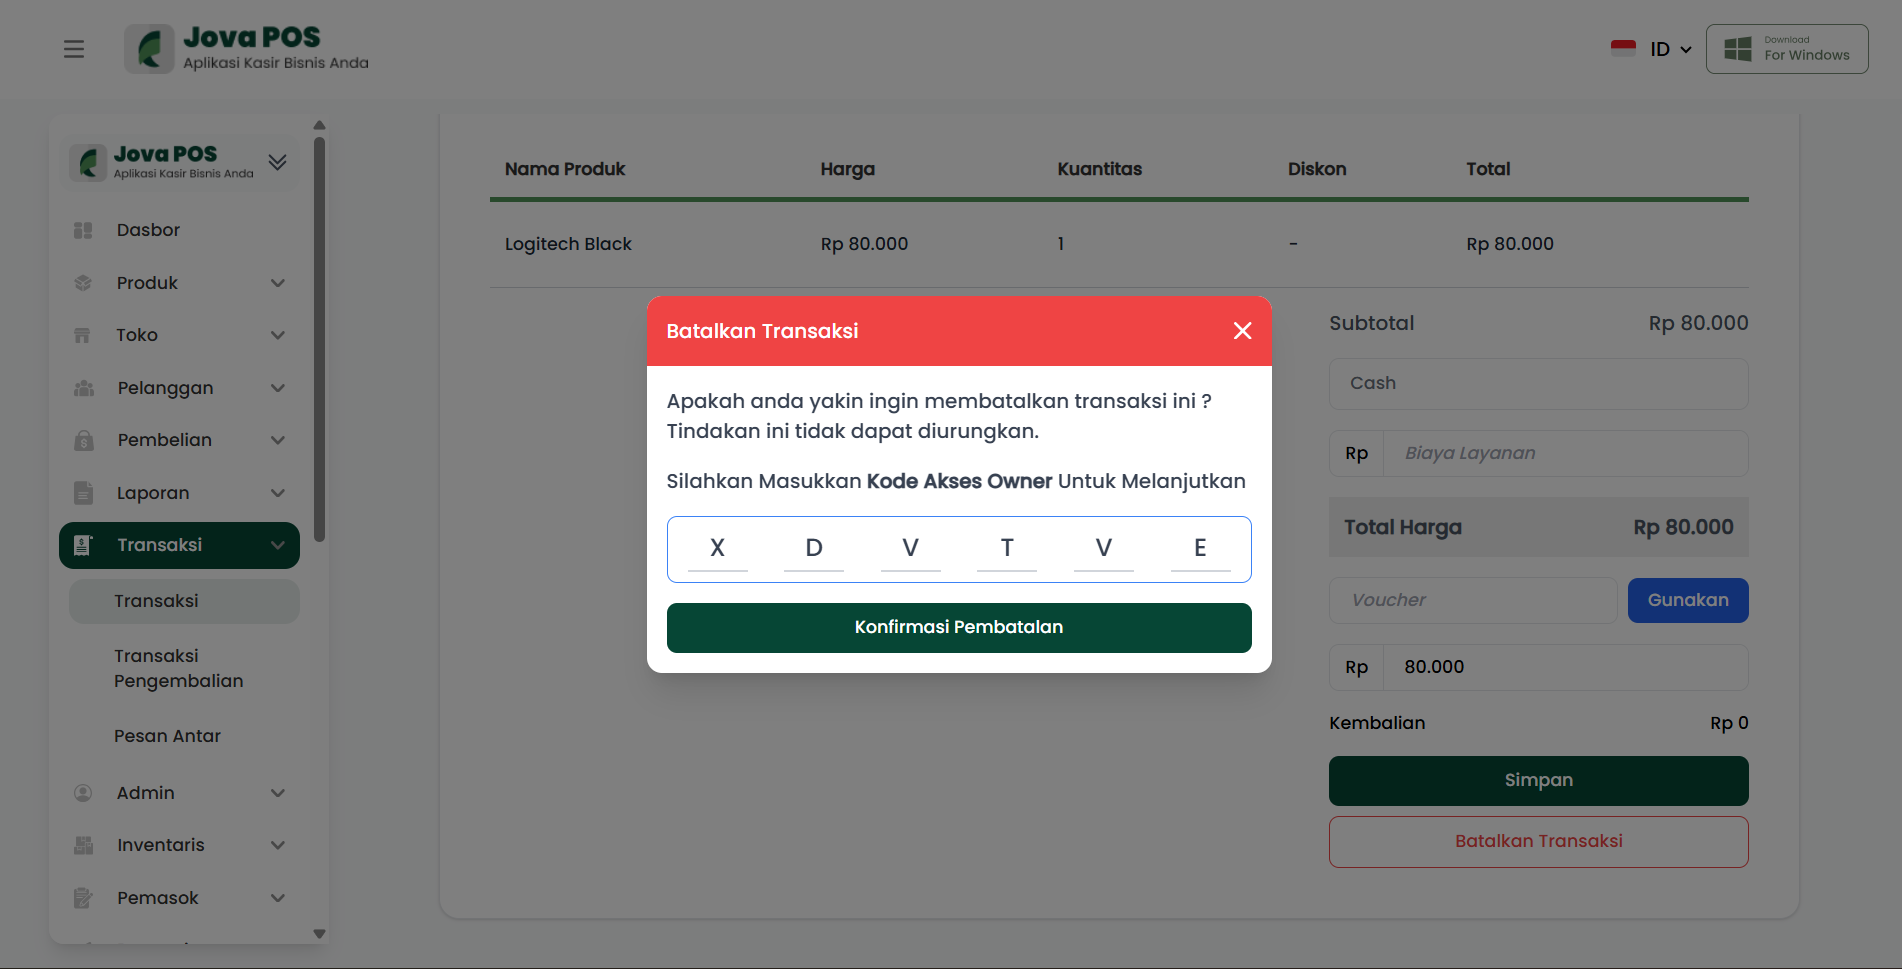
- Click Confirm Cancellation.
After cancellation, the transaction status may change according to system configuration (e.g., becomes Canceled or triggers a return process if payment/stock has already been recorded).